Framework Integration
The Zeugwerk Creator extension simplifies PLC development within the IDE (e.g. TwinCAT XAE Shell) by offering an intuitive user interface designed to generate and manage code for the Zeugwerk Framework. This integration allows you to easily prepare both existing solutions and new projects for the Zeugwerk Framework, streamlining your workflow and speeding up development.
The extension supports both Zeugwerk Framework applications and arbitrary PLC projects, offering full flexibility for your specific needs.
Key Features
- Code Generation: Automatically generate code based on the Zeugwerk Framework using an intuitive interface.
- Solution Preparation: Prepare existing solutions for use with the Zeugwerk Framework.
- Add and Manage Units: Easily add units to your PLC program and create instances of those units.
- Context-Sensitive Menus: Manage and configure equipment (I/O, controllers, actuators, axes, etc.) through a simple right-click interface.
Showcase
In this user-guide, we will focus on creating an actual Zeugwerk Framework Application and more specific, we will re-create the PLC from the Quickstart Tutorial. Everything shown here applies to arbitrary PLC solutions, which were initally developed without a Framework or a different one.



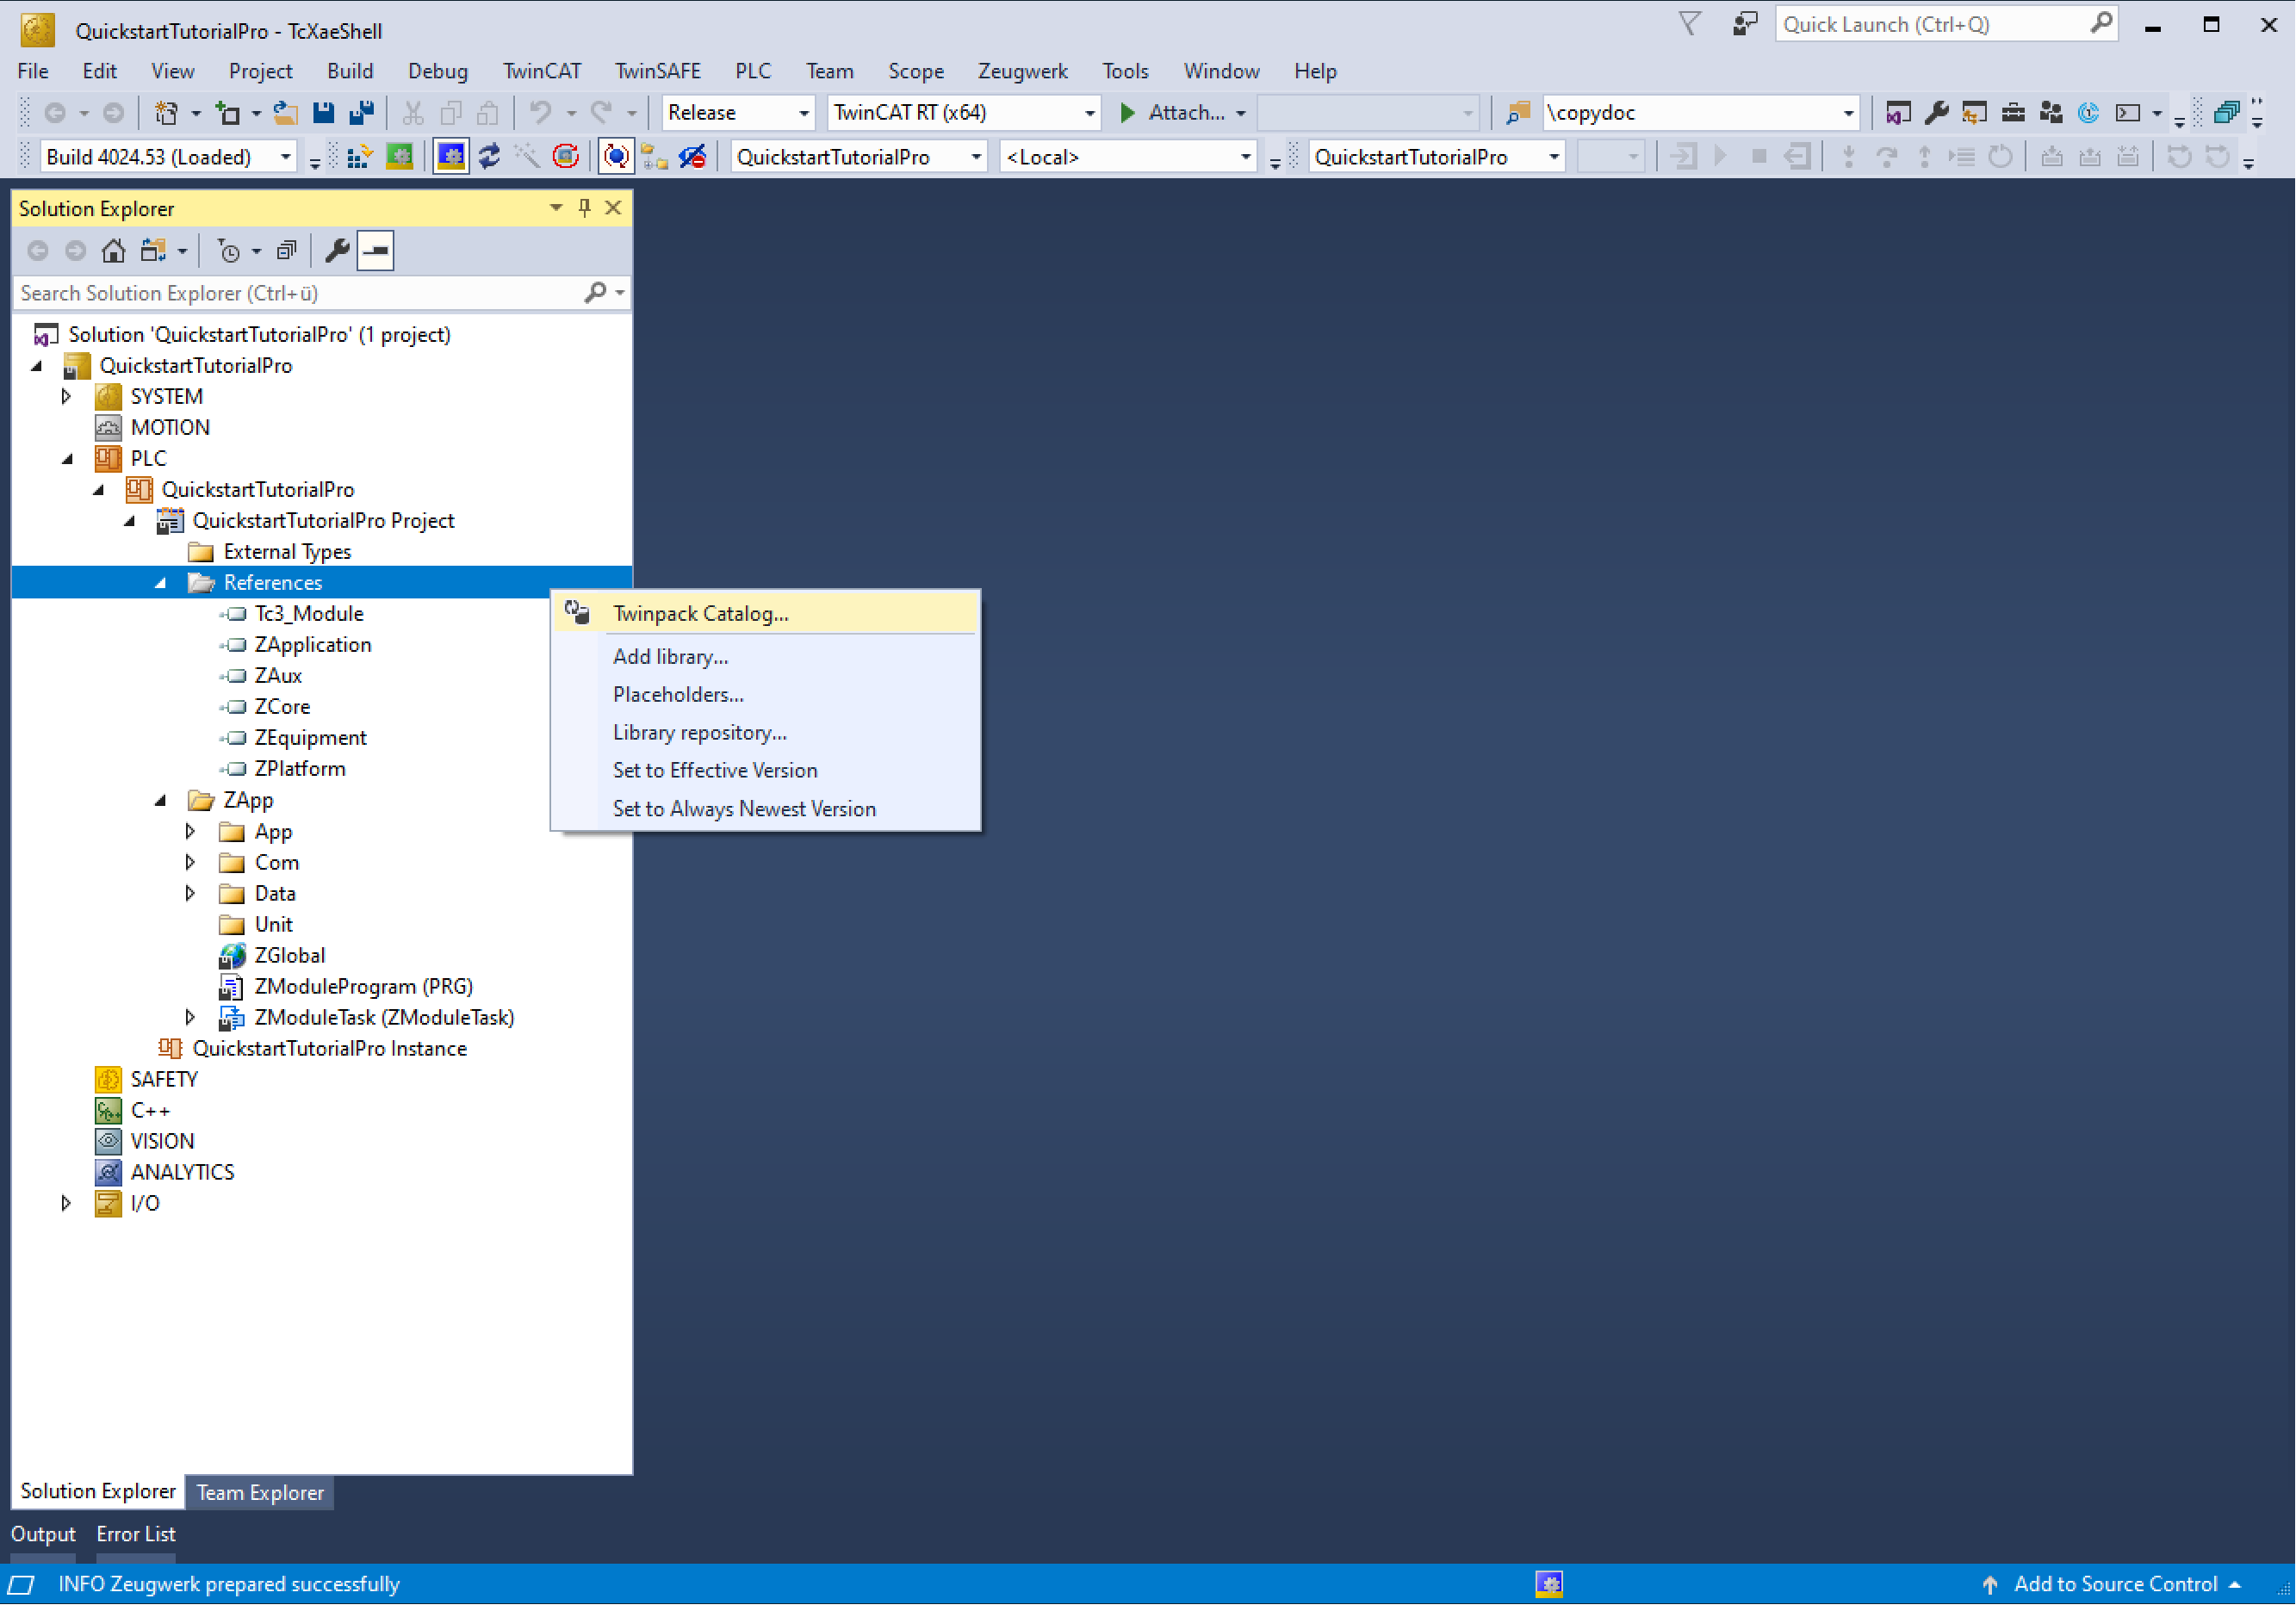
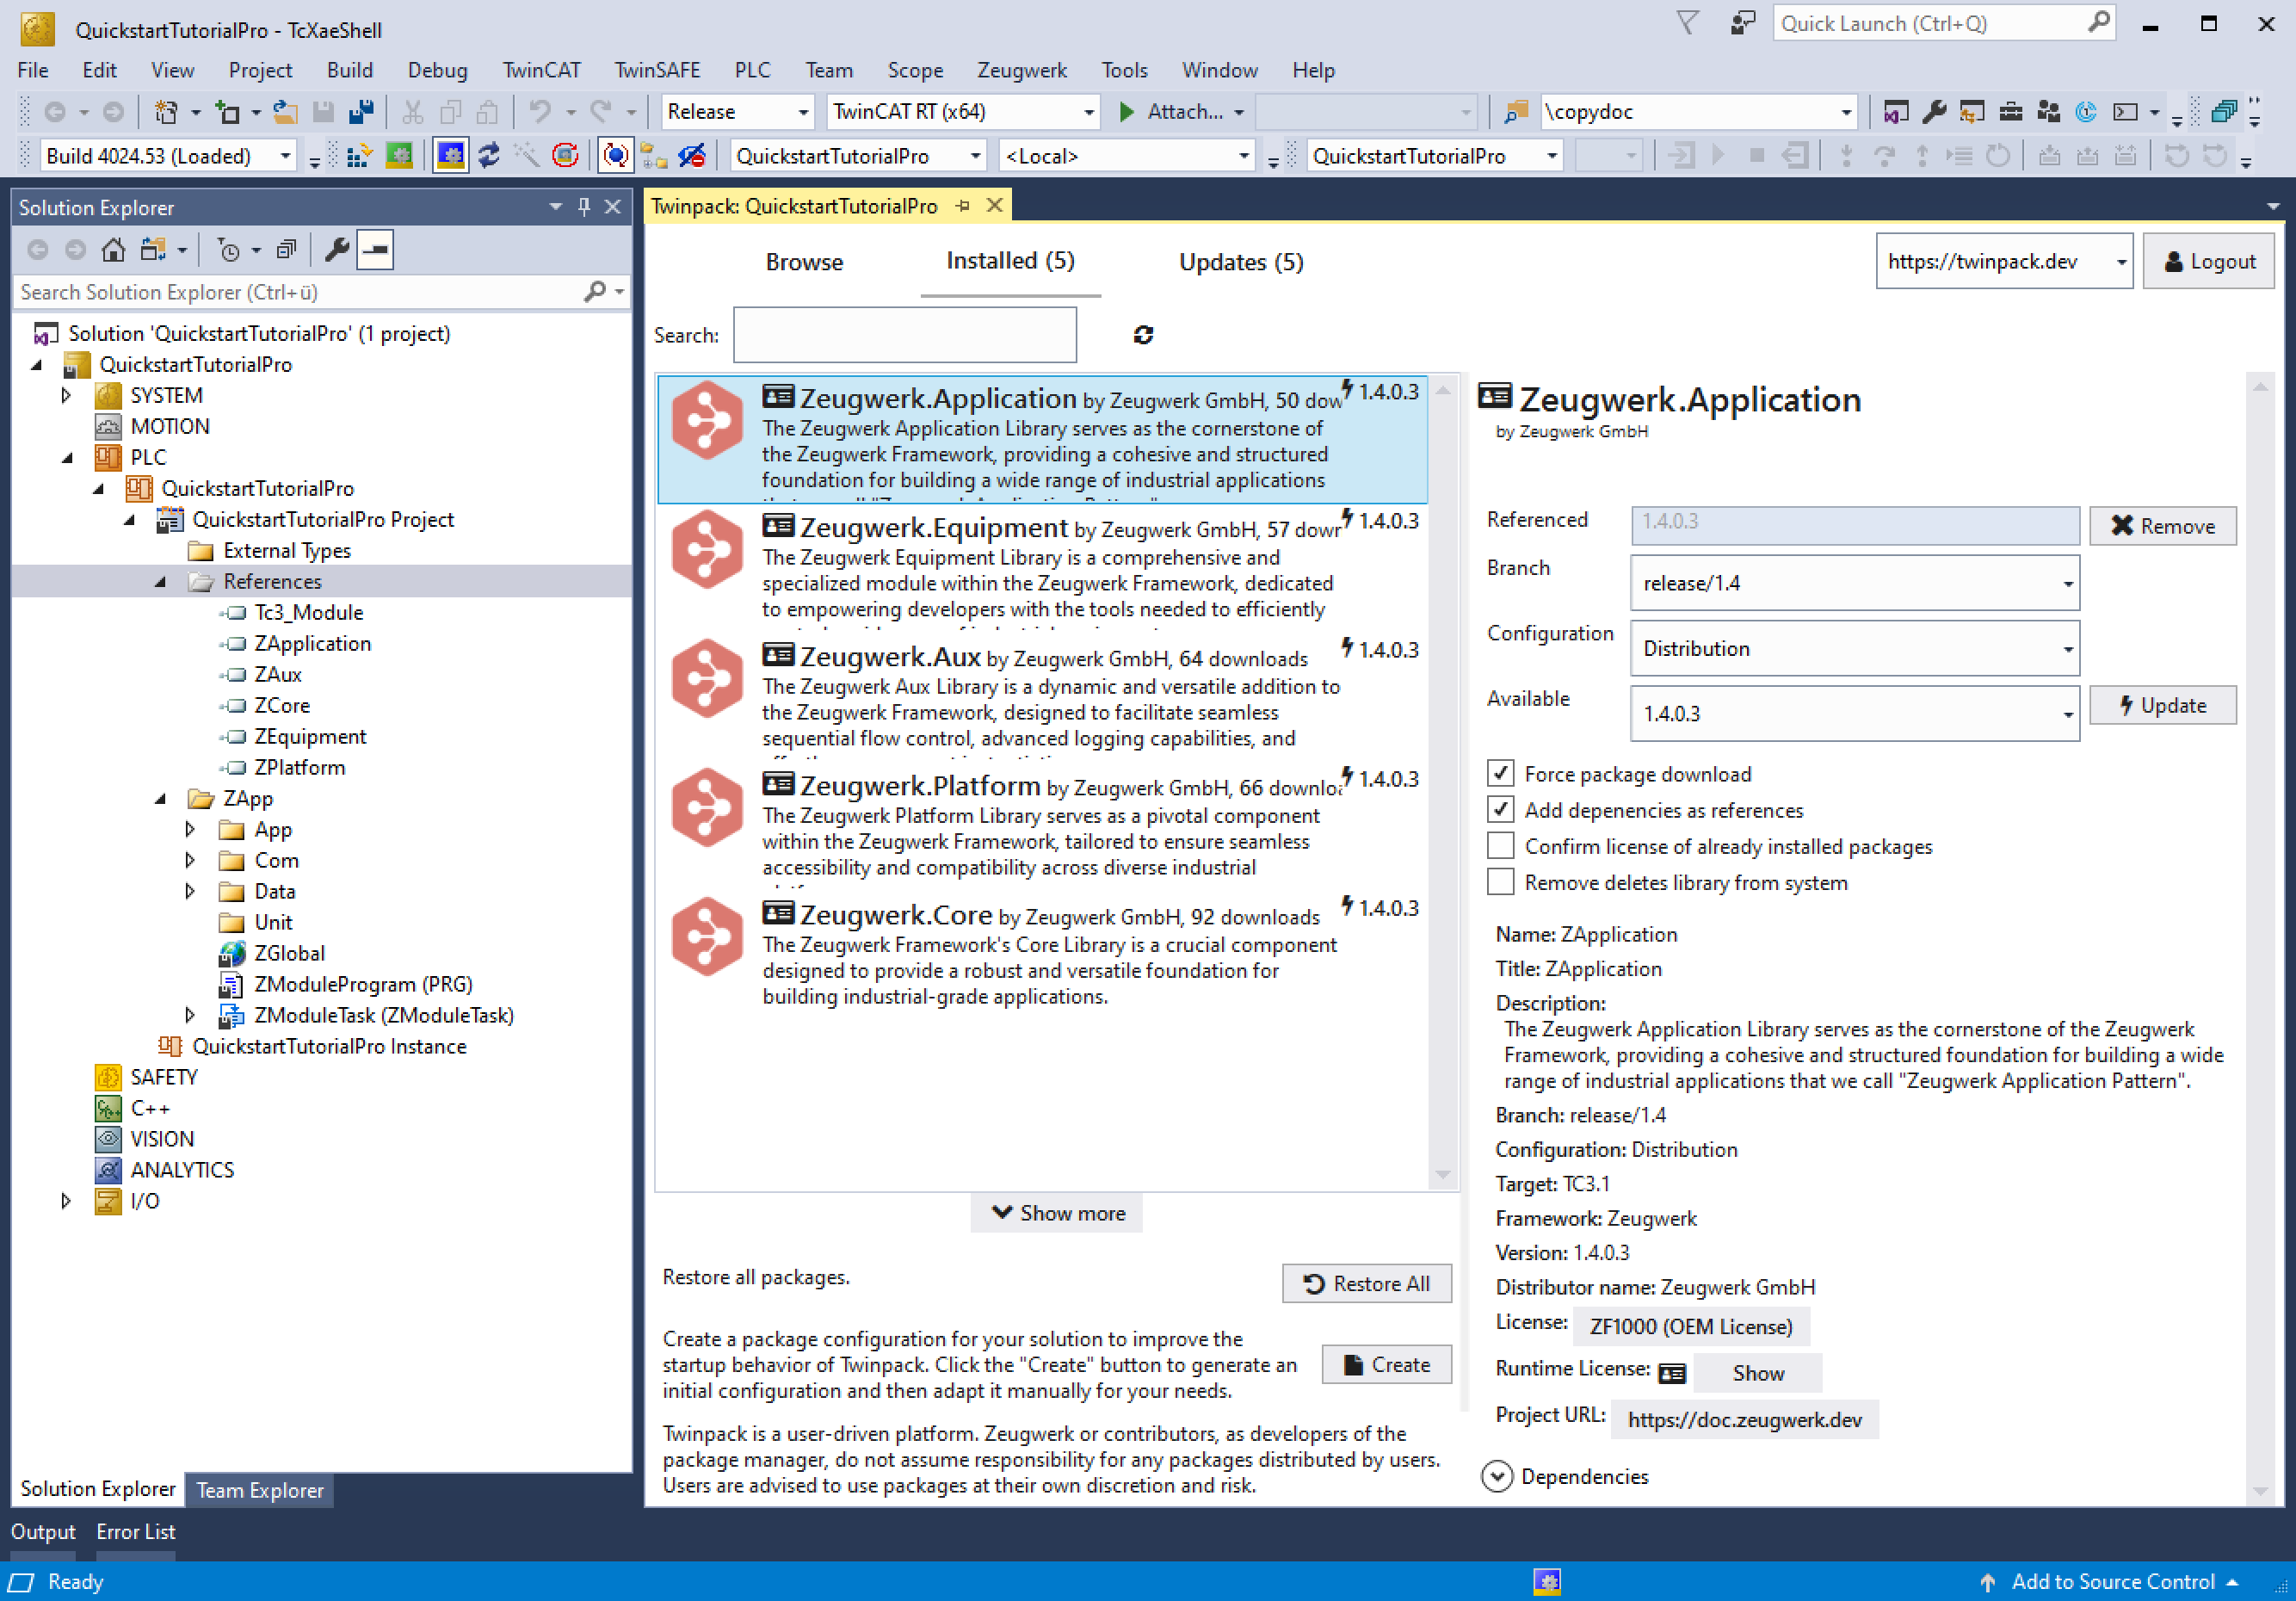
Initially, the libraries of the Zeugwerk Framework have to be installed via Twinpack. We consistently provide bugfixes for issues that are reported by the community and our customers. Navigate to the plc node in your solution explorer and open the QuickstartTutorial - PLC node. Go down to References and right click on it.
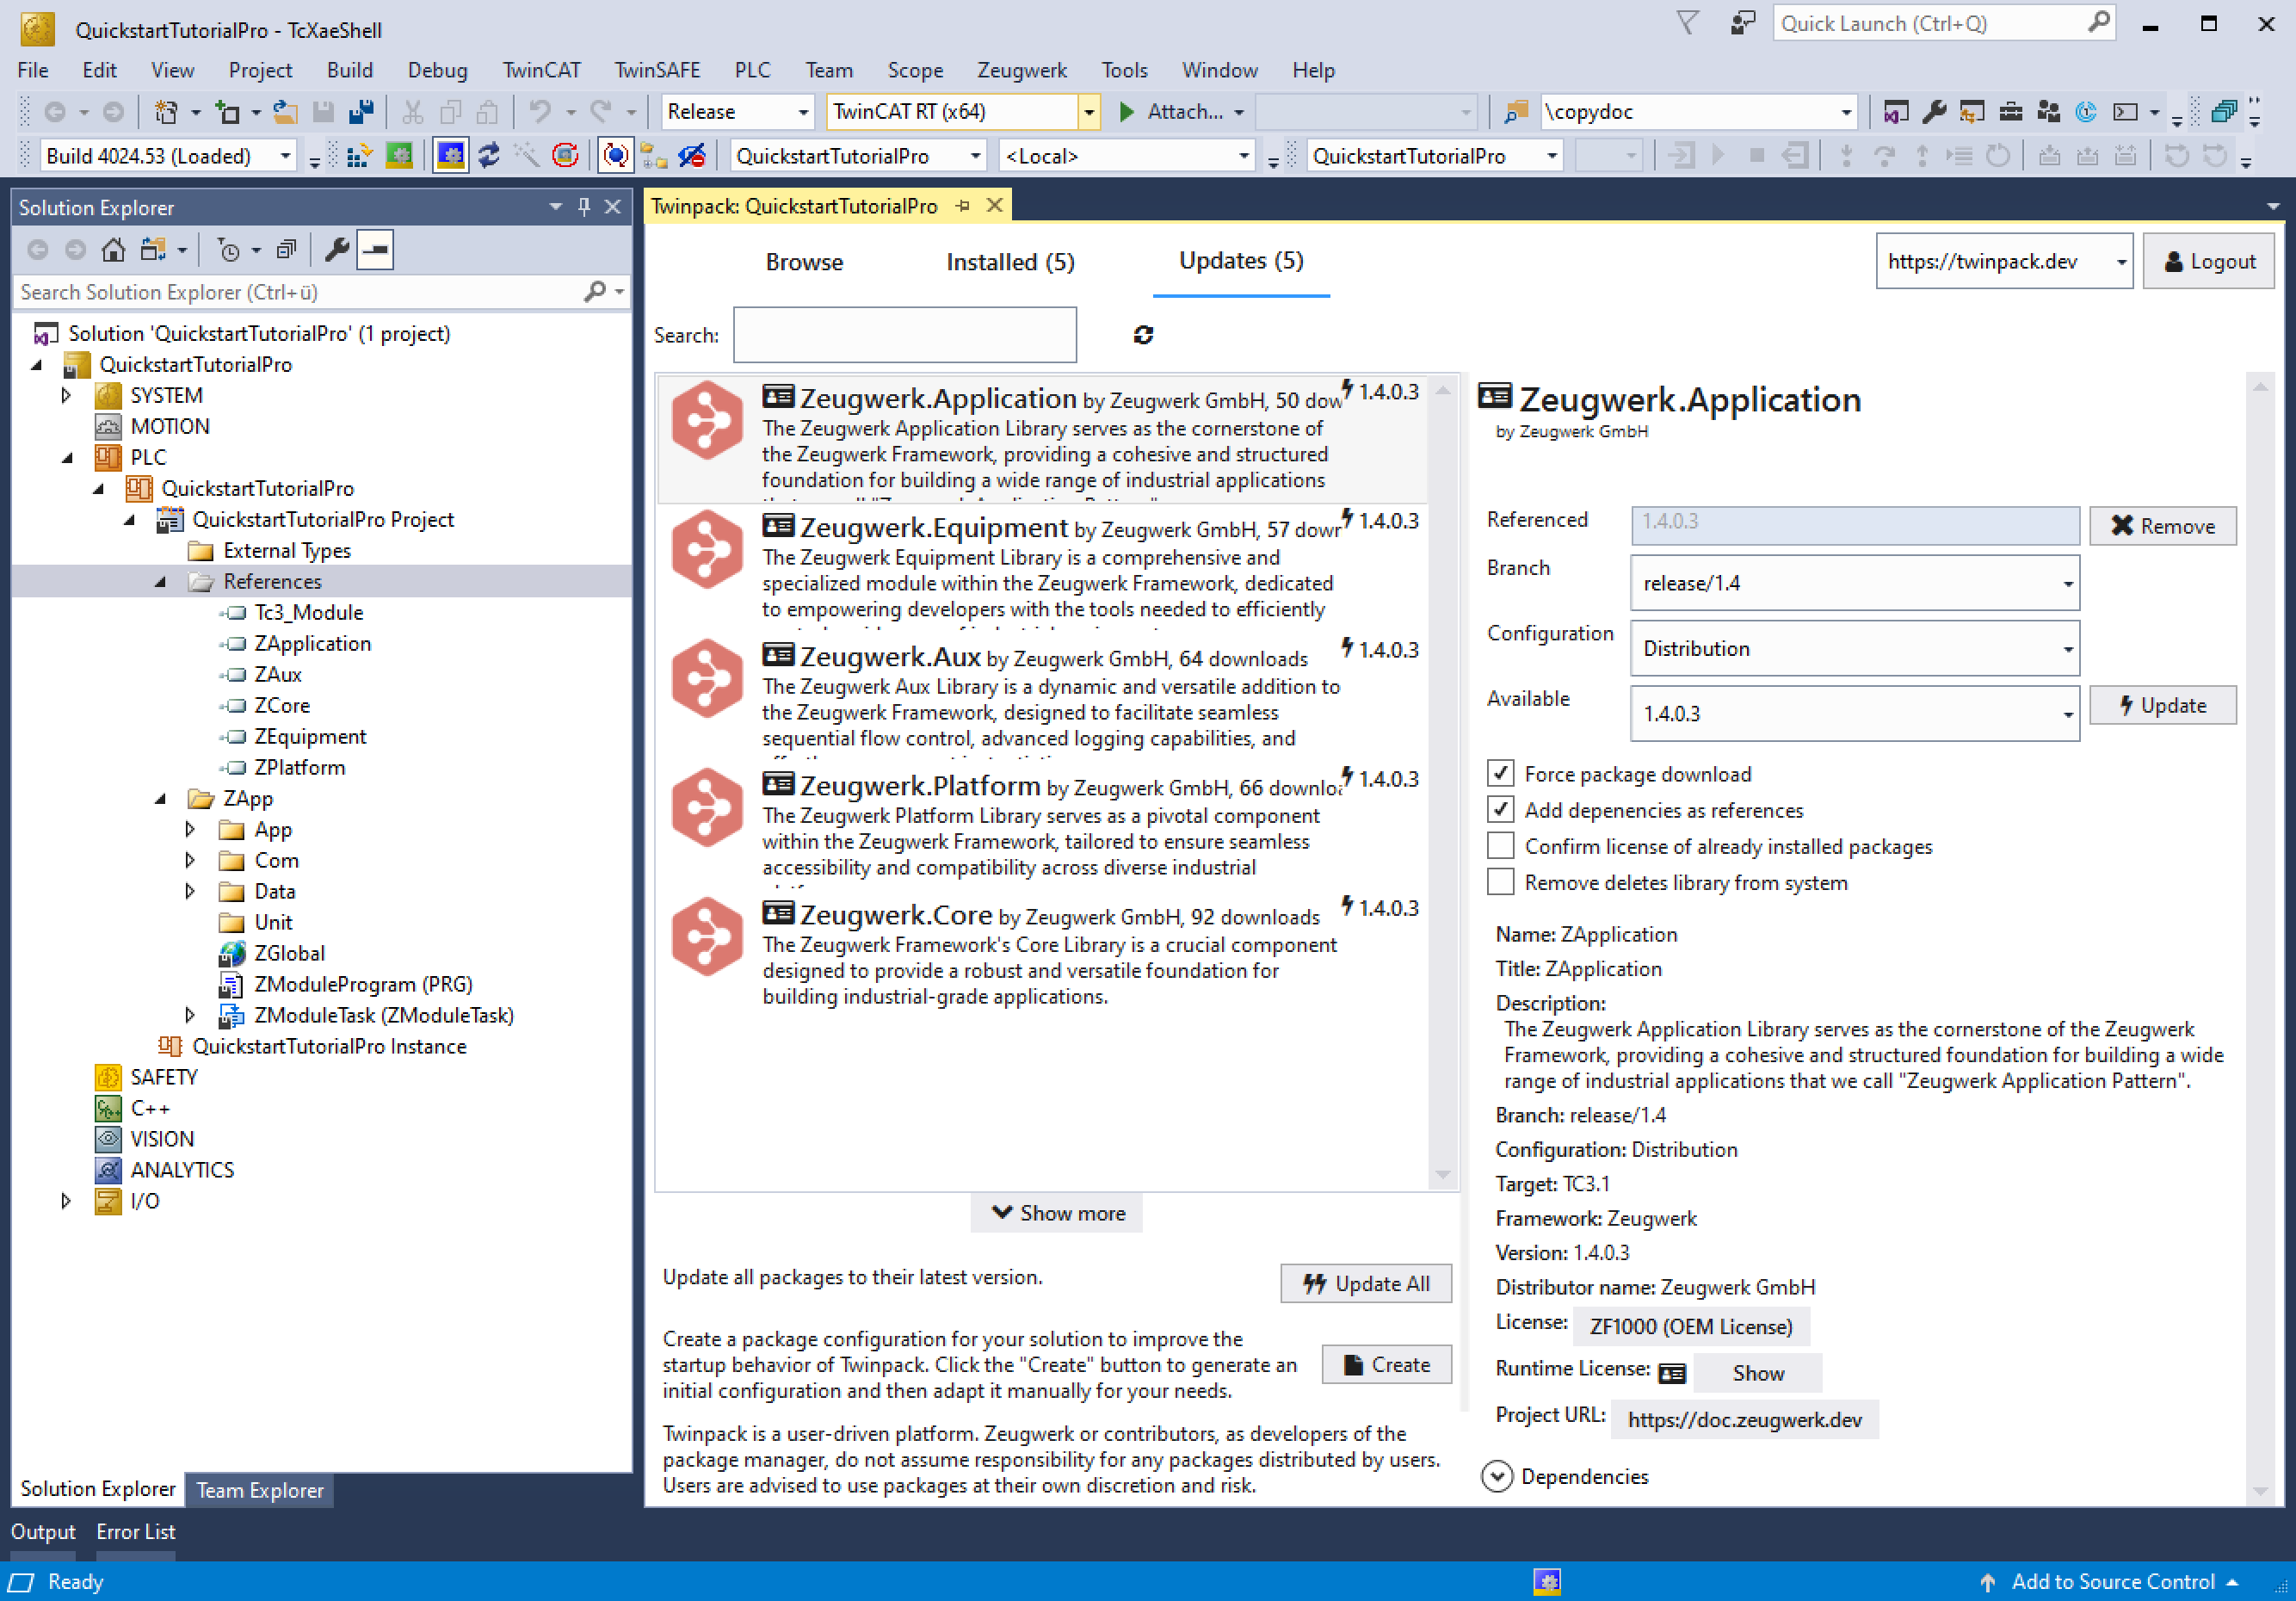
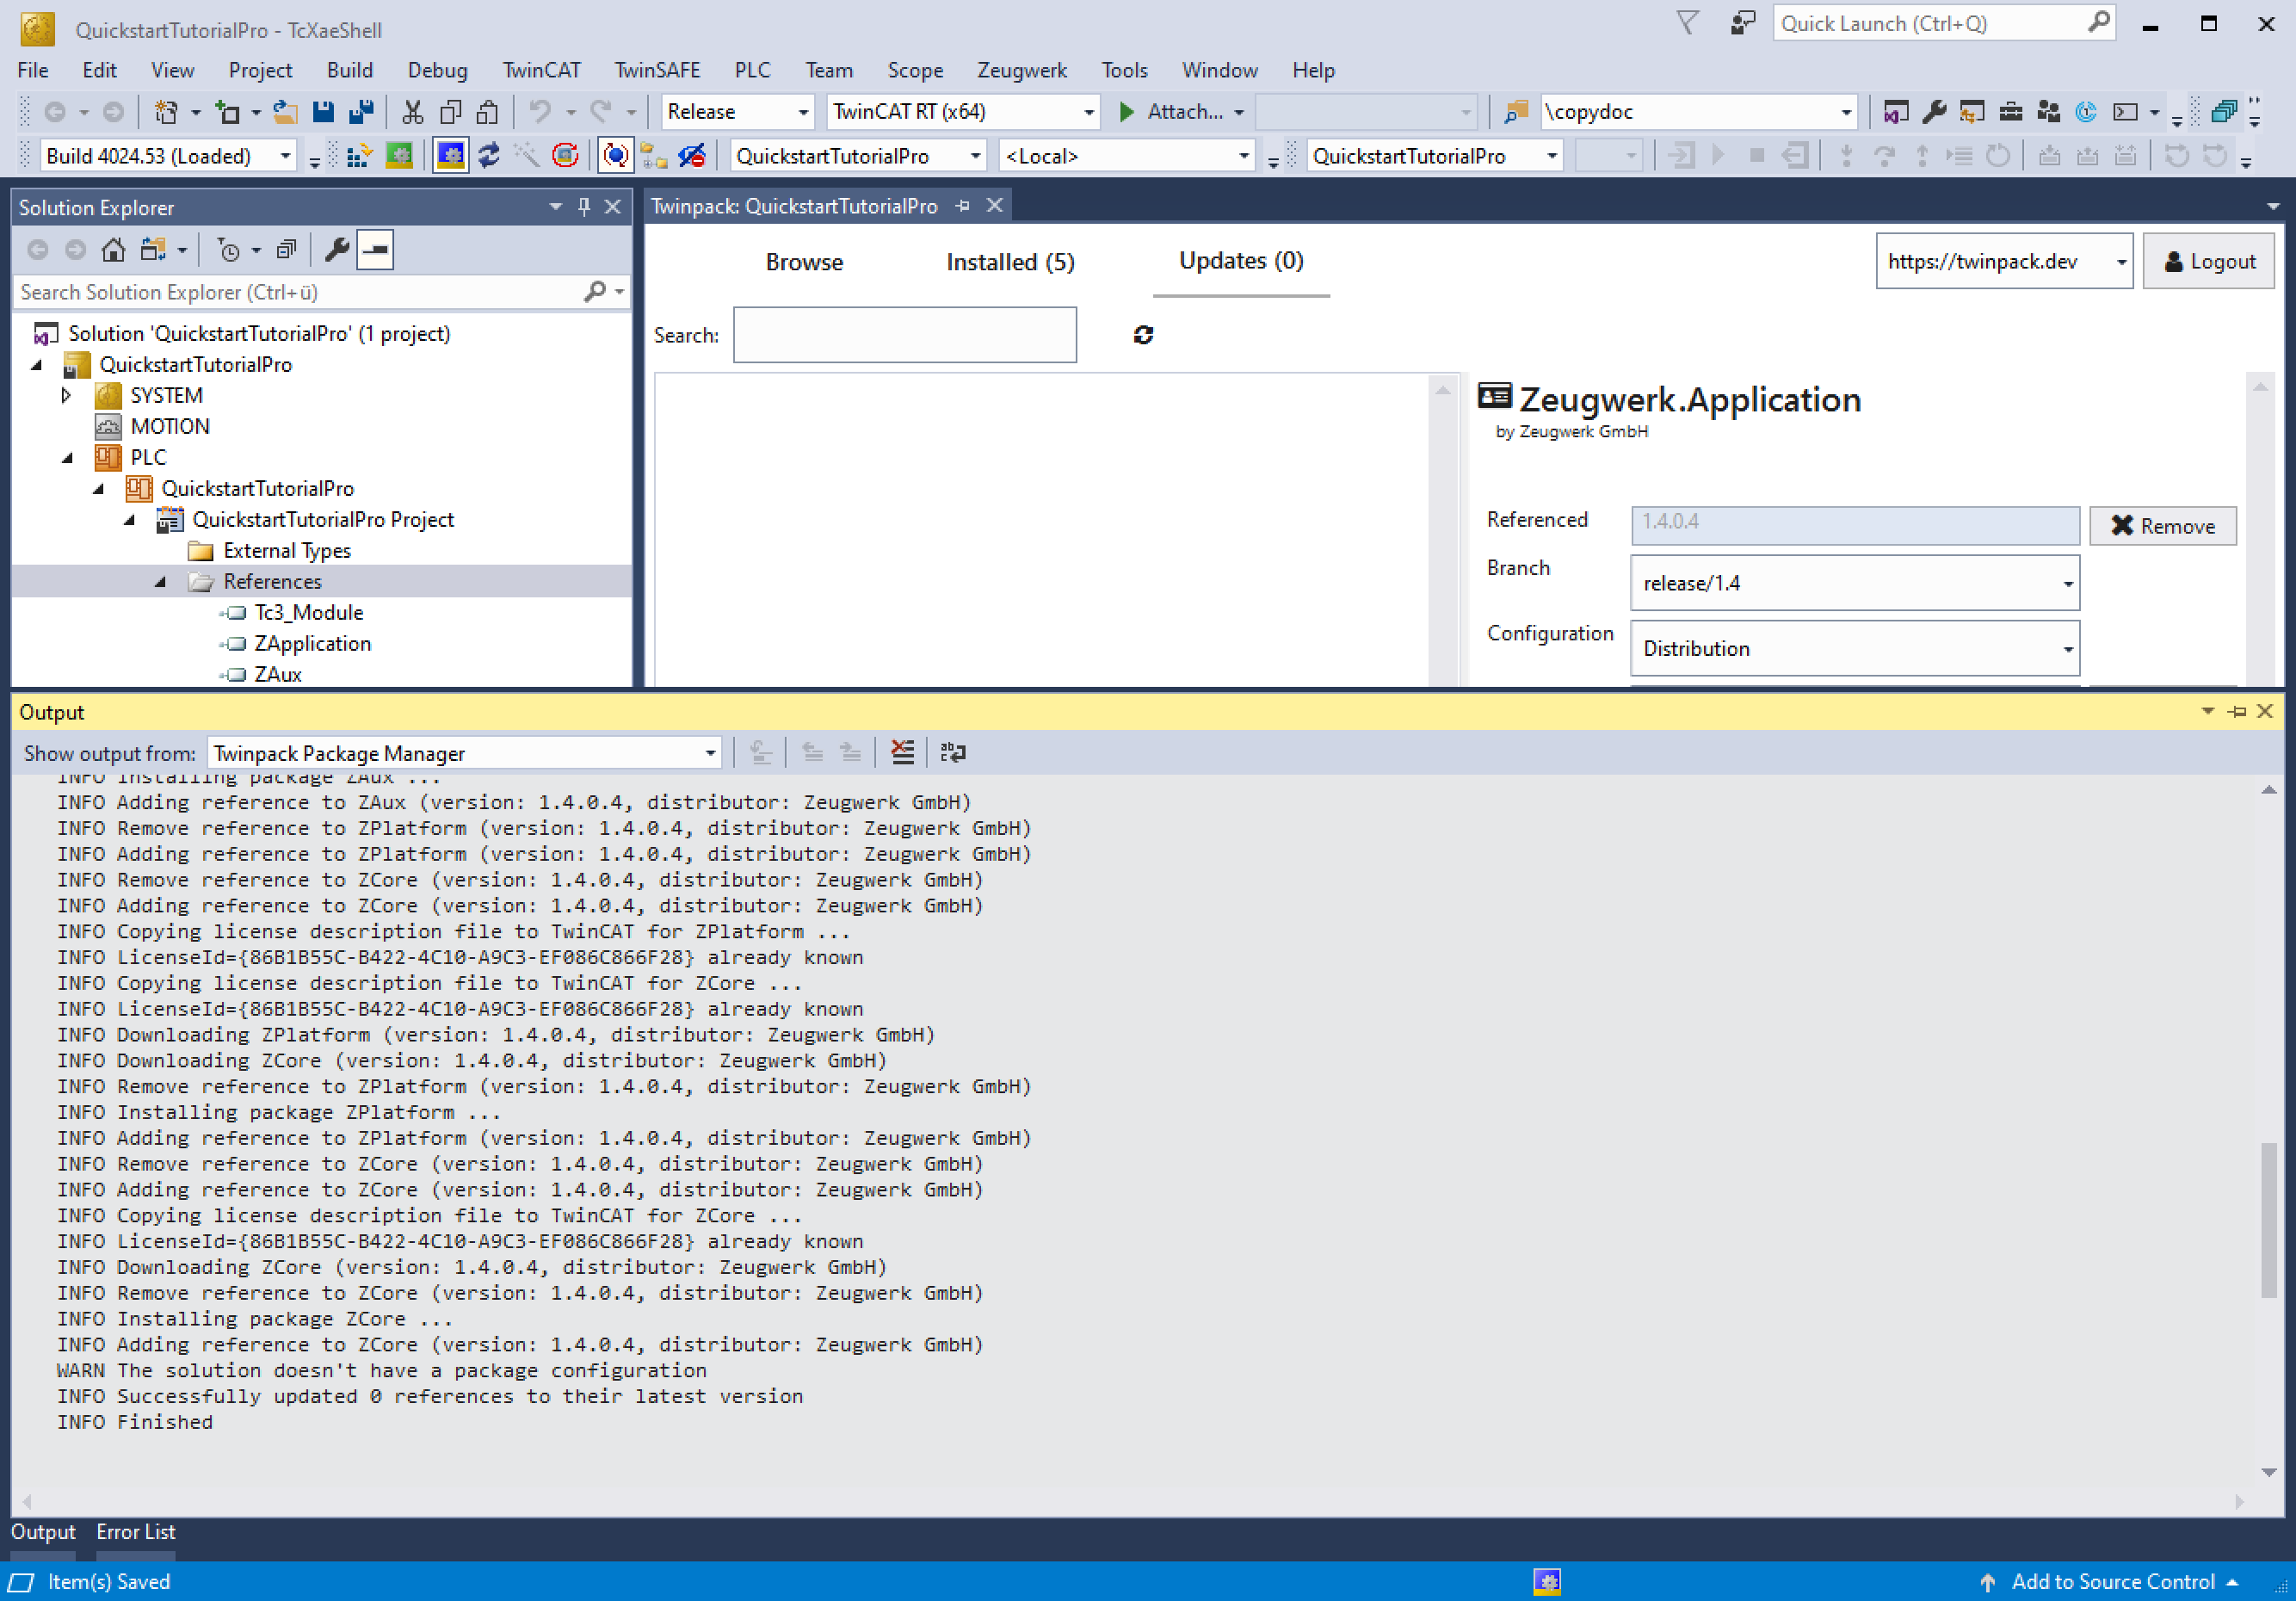
Select Twinpack Catalog which then opens and shows you directly the installed libraries of Zeugwerk Framework. If there are updates available this is shown by a lightning symbol on the right top corner of each library entry. You can also click on Updates on right beside Installed and then you can click on Update All at the bottom of the list. Twinpack will then install the newest version of the Zeugwerk Framework libraries and update its references on the PLC side.
Activate License
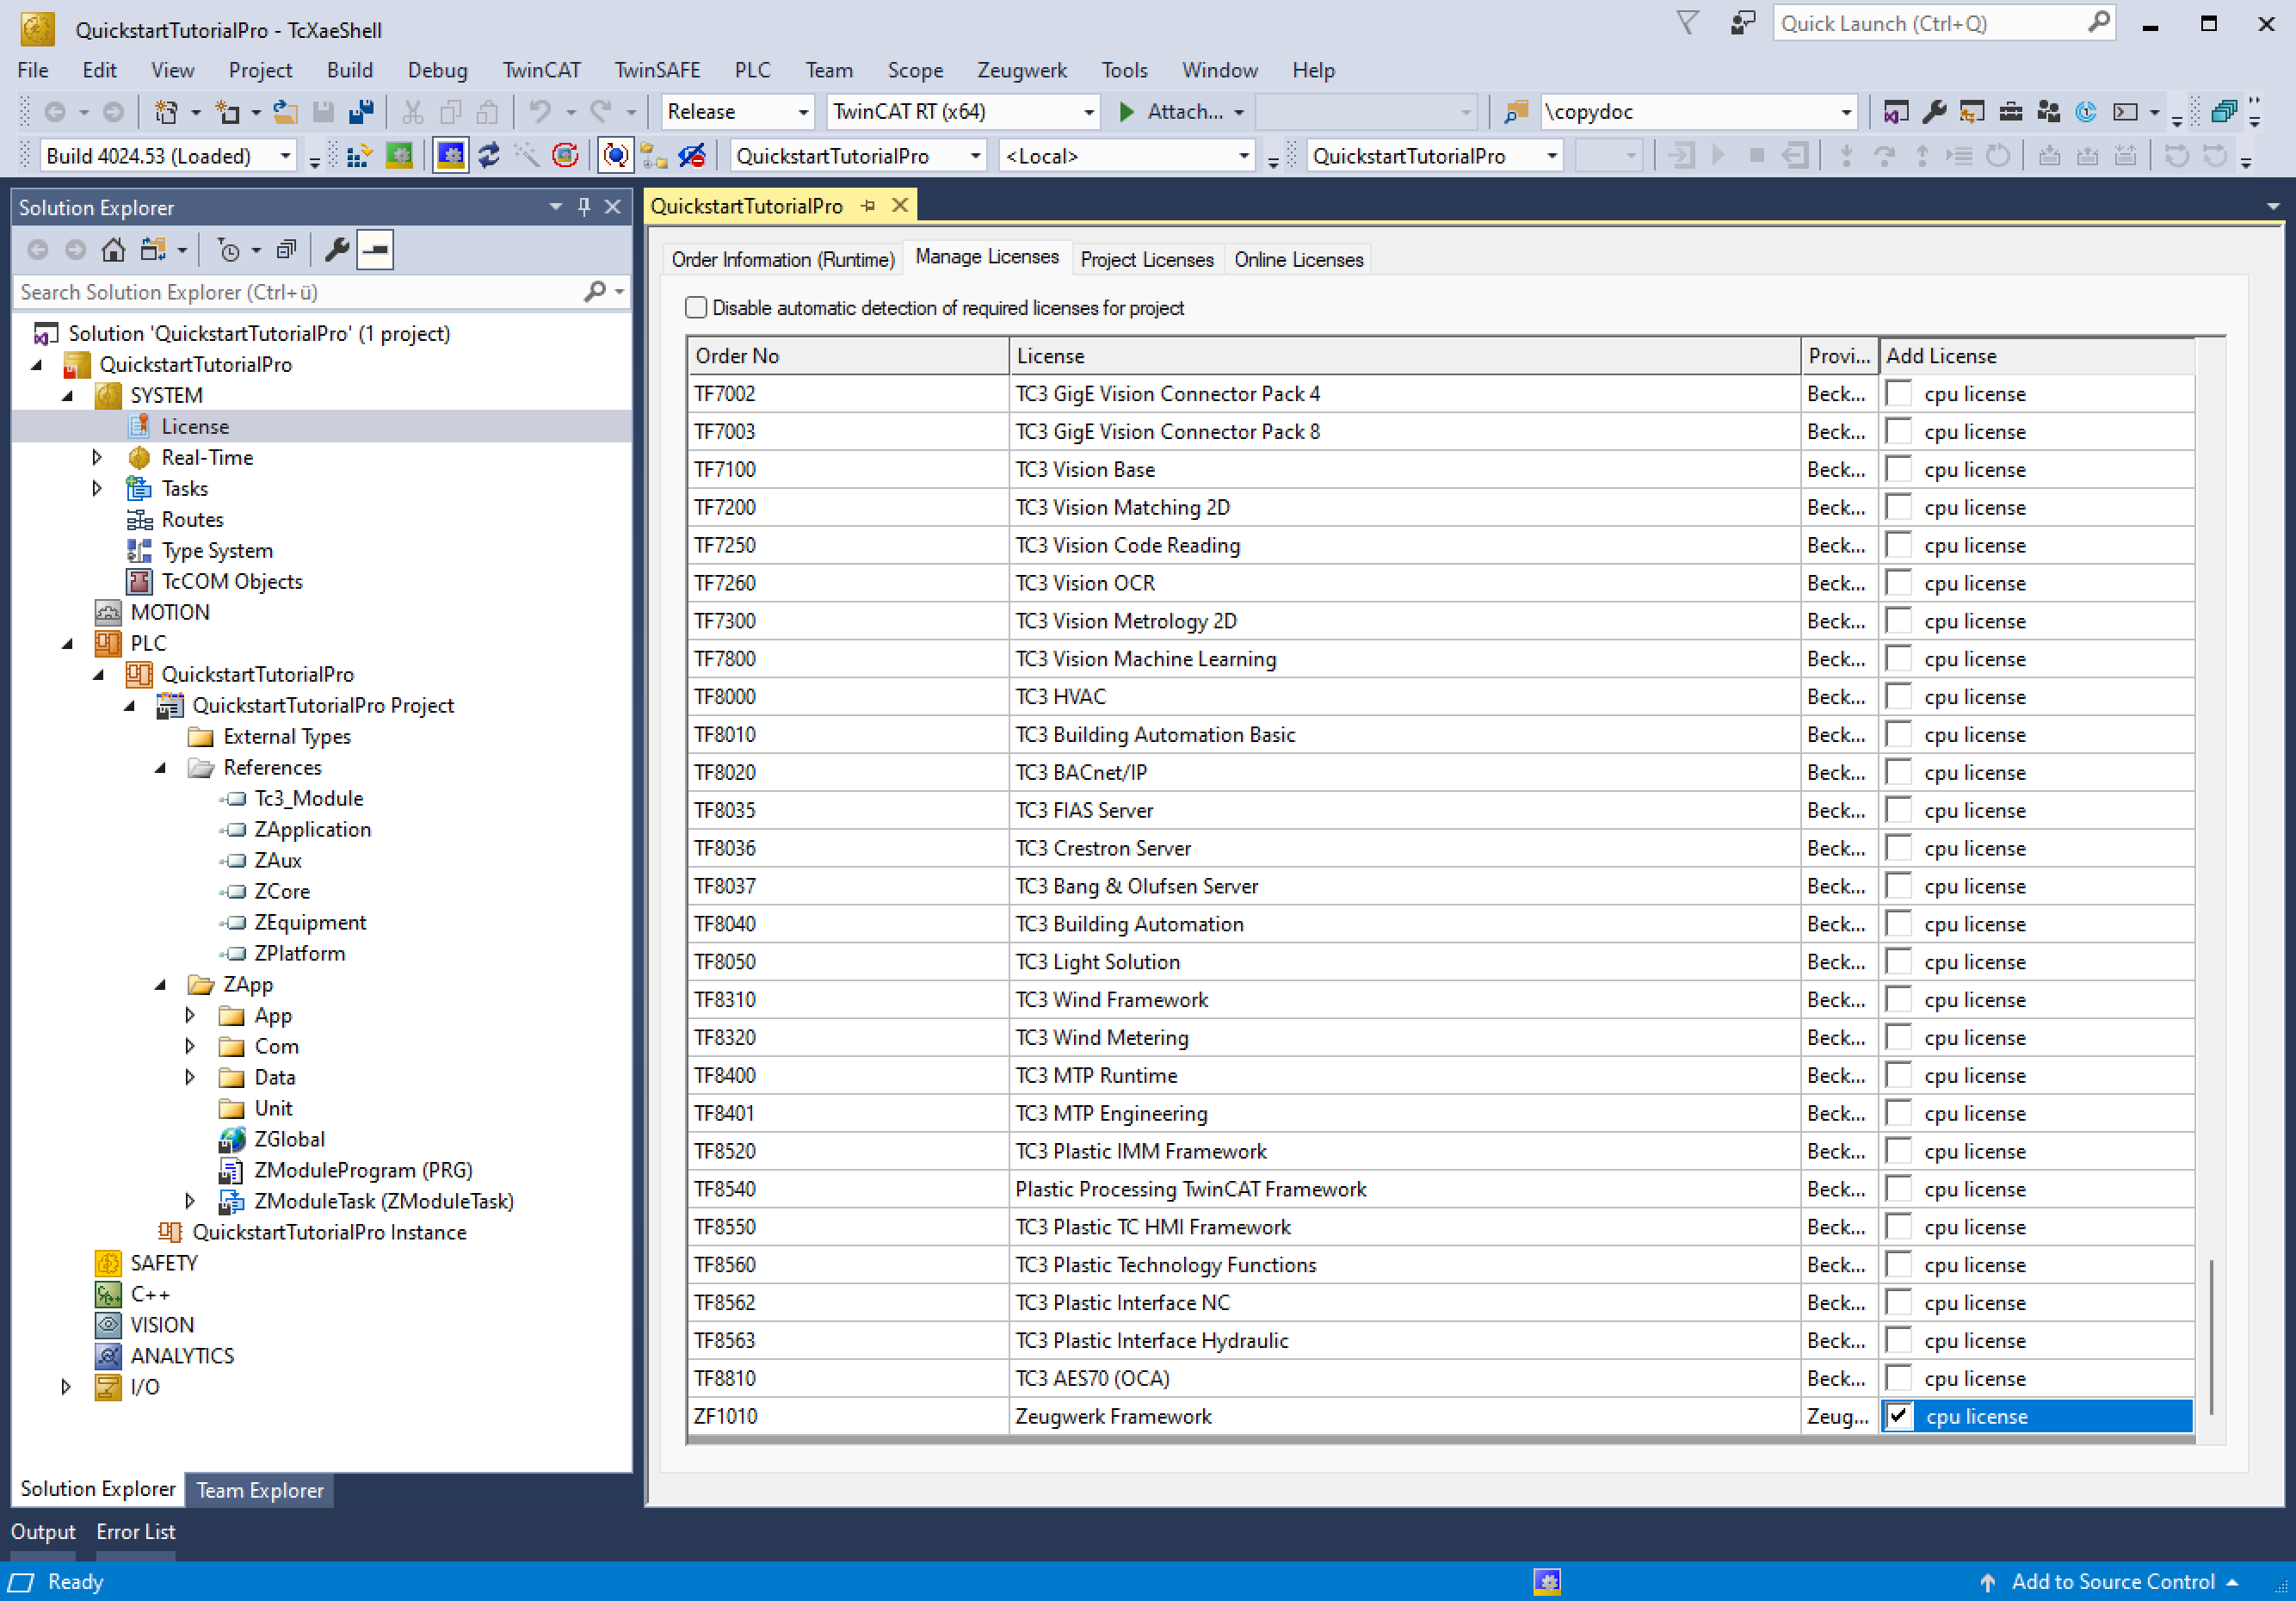
The Zeugwerk Framework can be conveniently licensed through Beckhoff's easy-to-use licensing mechanism. You can also run a 7-day trial after your first activation. To ensure the license check functions correctly, follow these steps:
- Navigate to the SYSTEM node in the Solution Explorer.
- Double click on License.
- Open the Manage License tab.
- Scroll down to the bottom of the list.
- Activate the checkmark for ZF1010 - Zeugwerk Framework to select the correct license for working with the framework.
This selection is necessary to activate a runtime license of the framework for your application on the desired runtime environment.
See this tutorial for more details on how to add the License.
Prepare Solution for Zeugwerk Framework
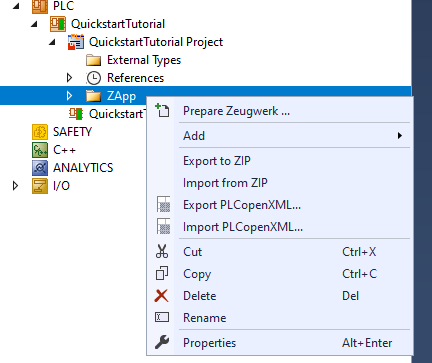
Right-click on the ZApp folder of your PLC and click Prepare Zeugwerk ... the solution in the Solution Explorer.
Re-create Quickstart Tutorial with the Framework Integration
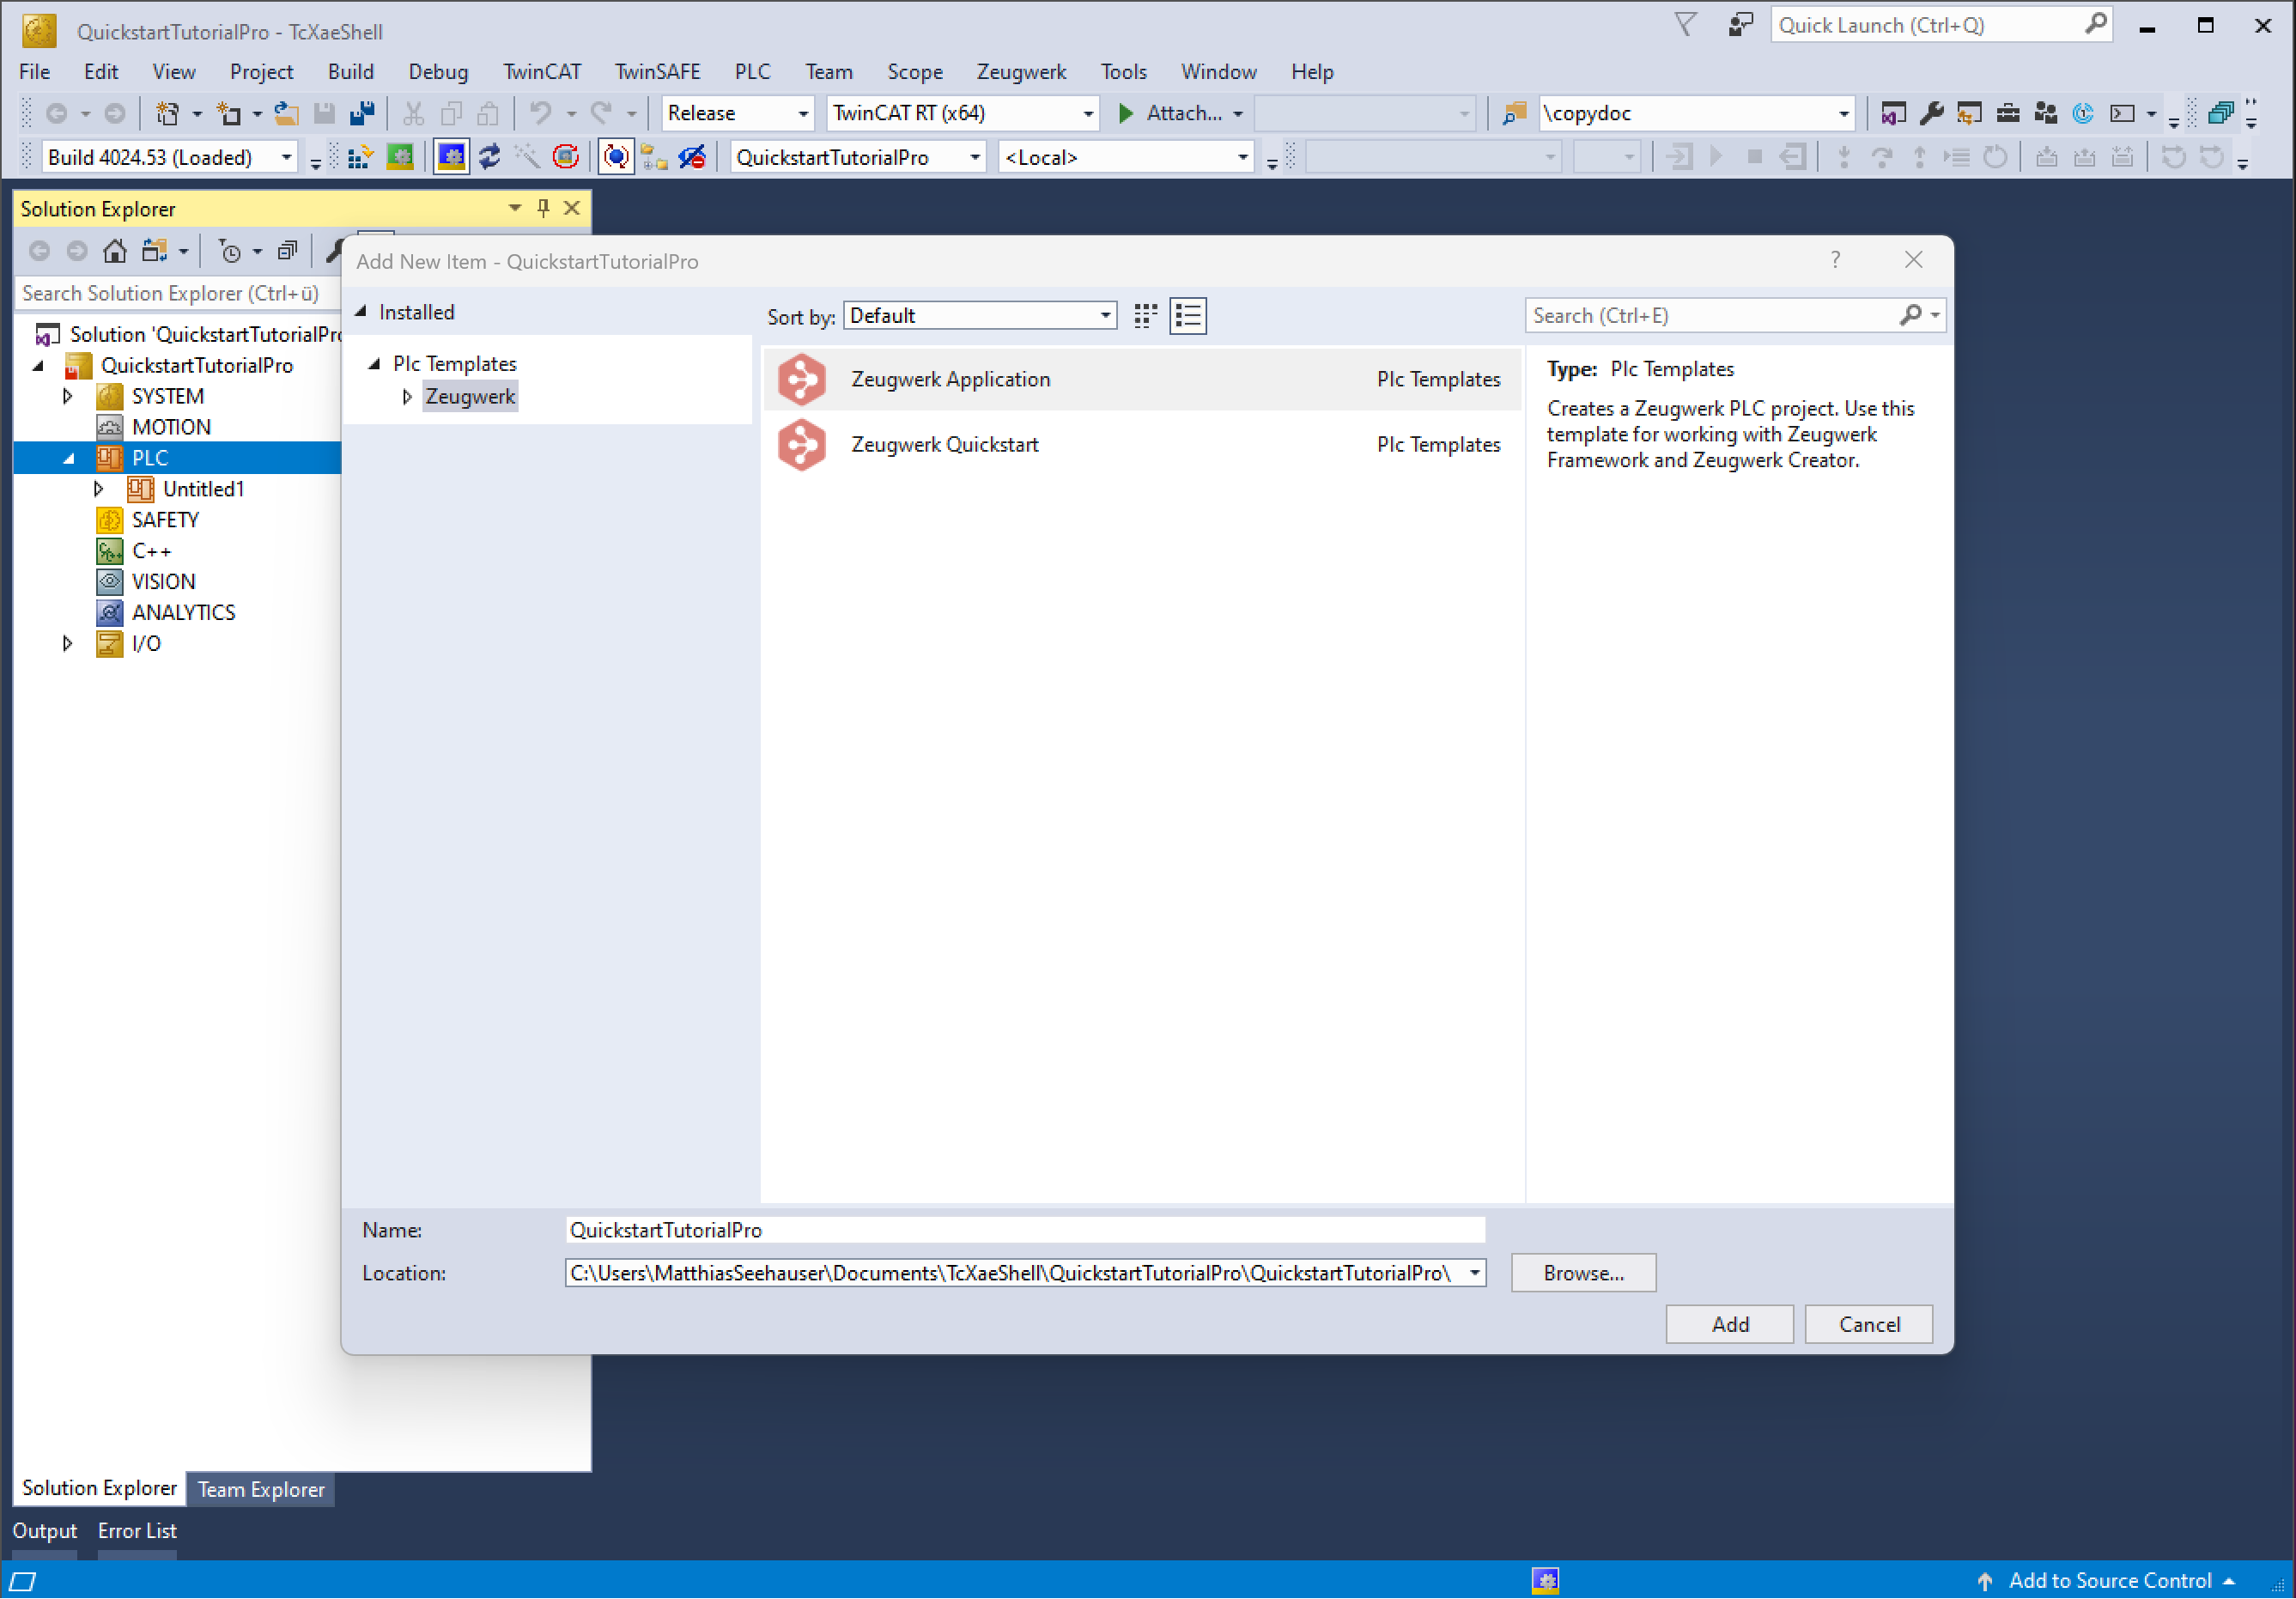
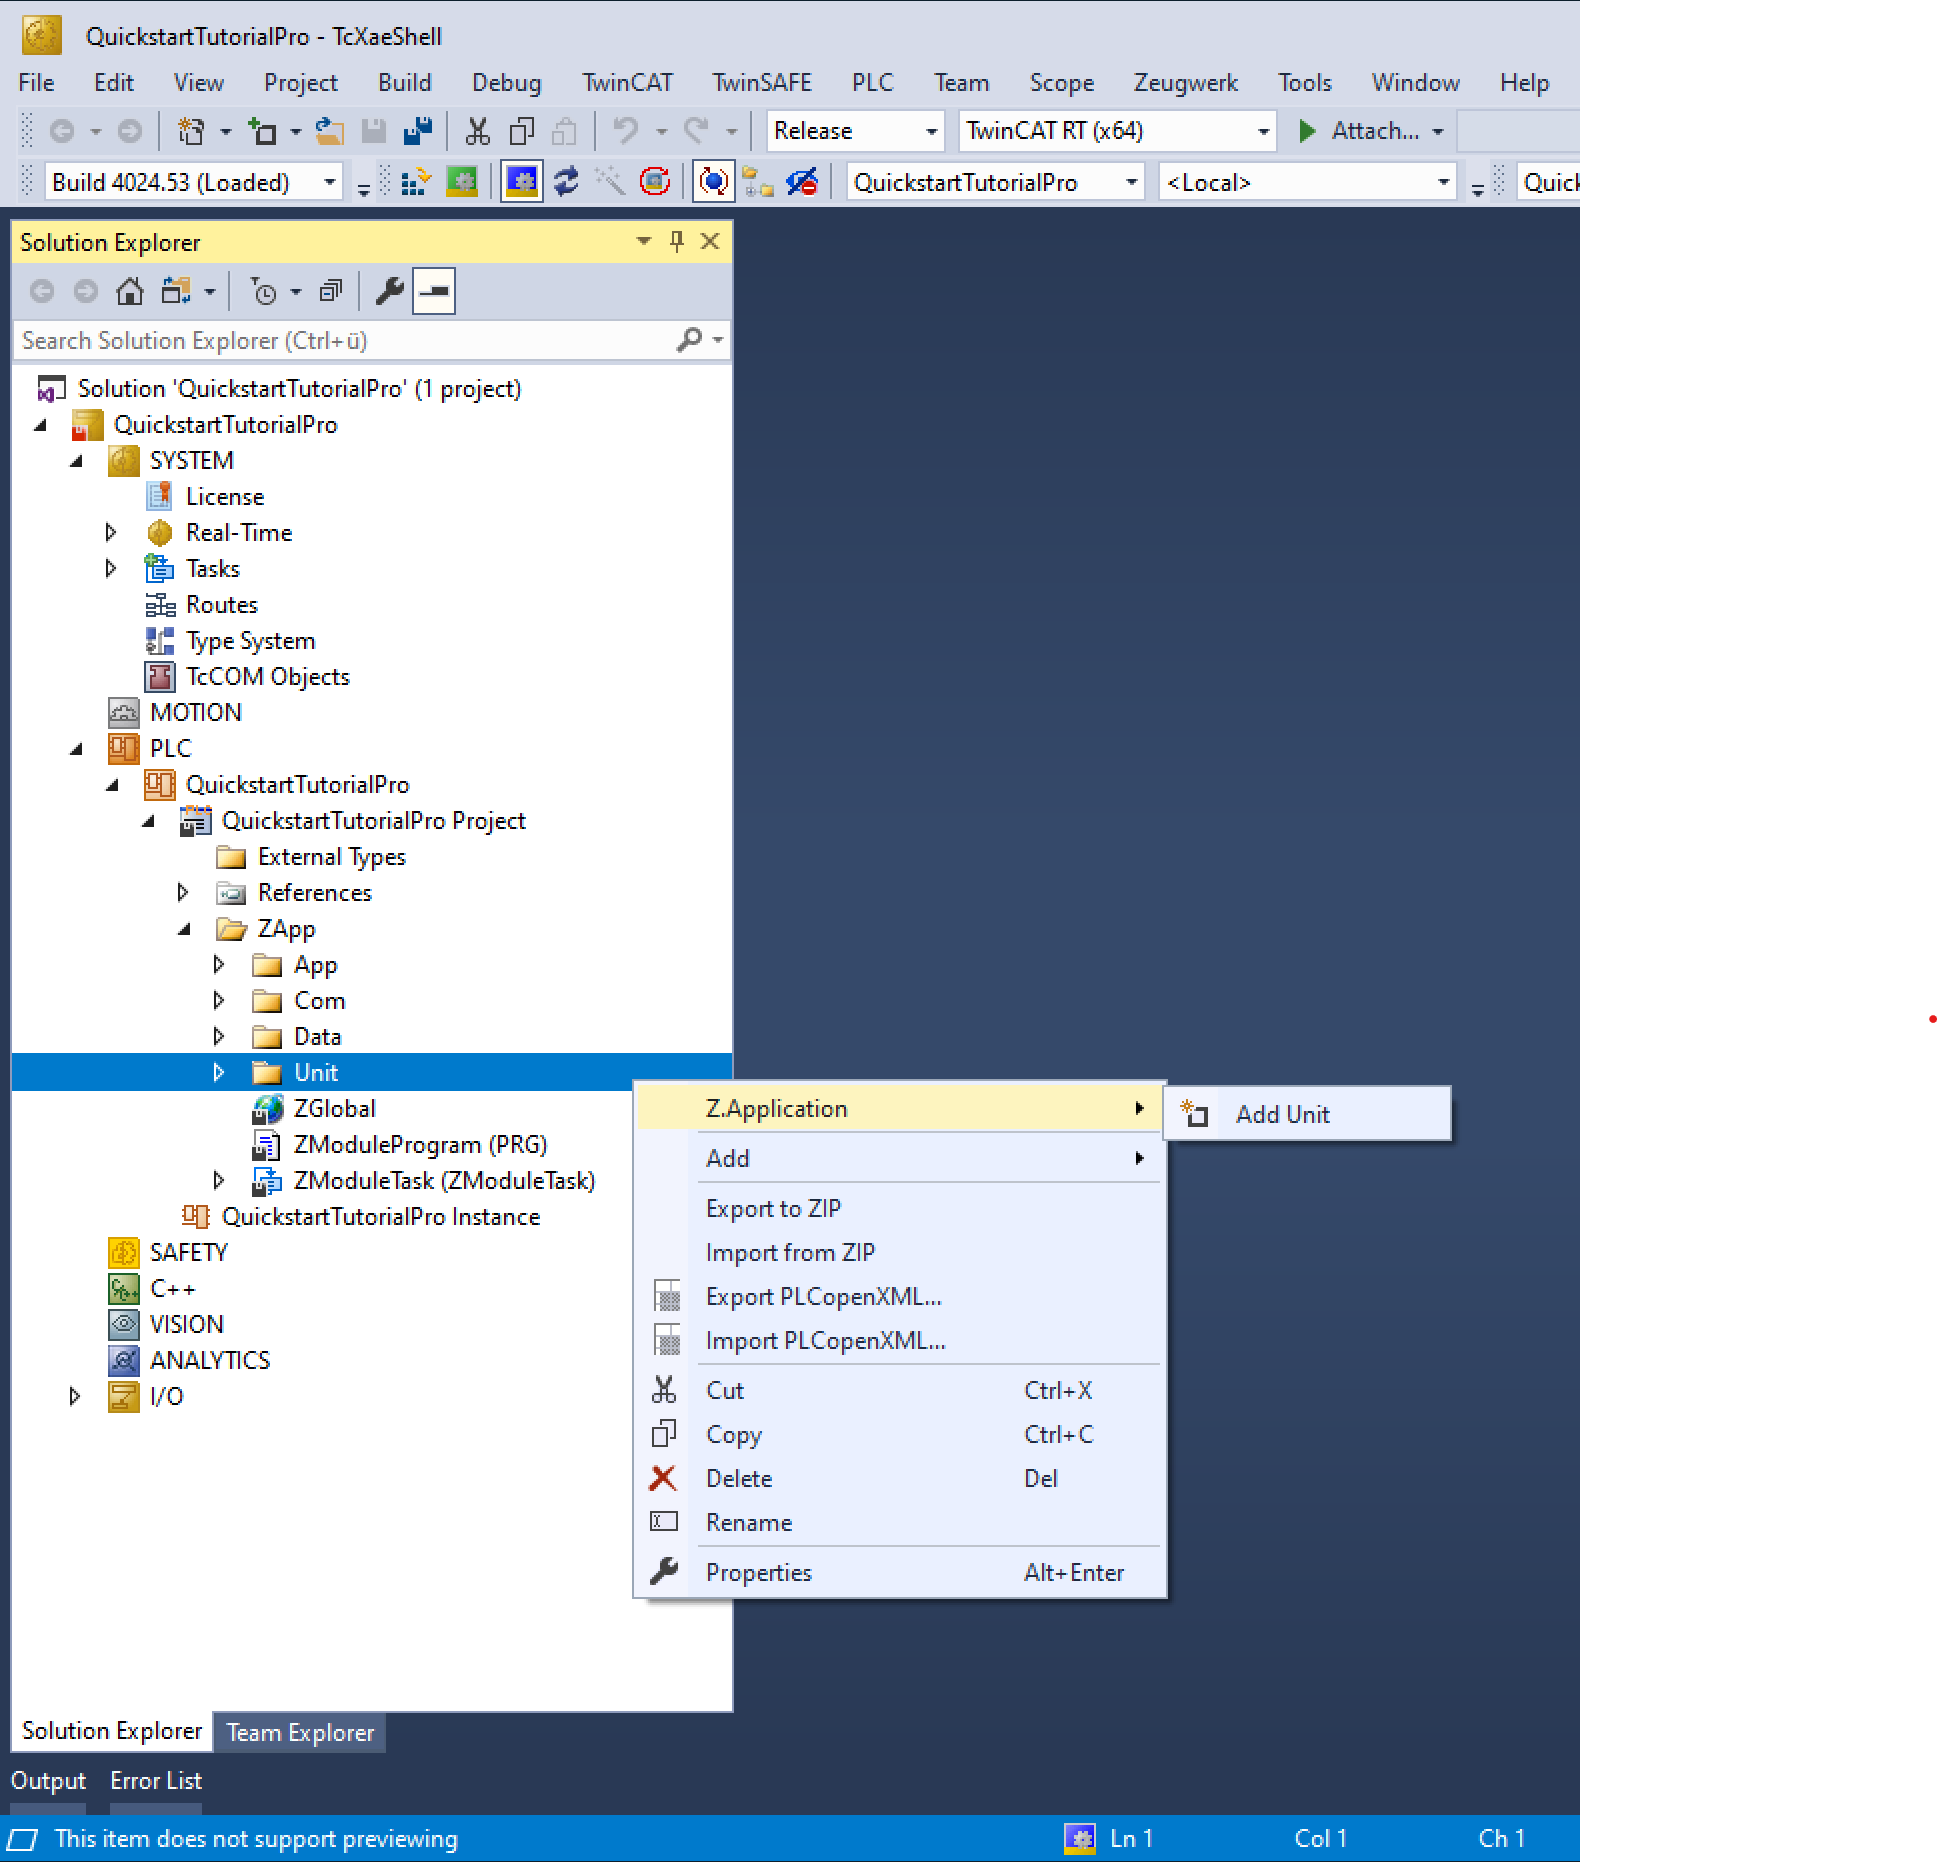
The Quickstart Tutorial is kept rather simple and only used one Unit, which we name Quickstart. To create this unit, open the PLC node on the right side of your Twincat Development Environment in the Solution Explorer and open ZApp > Unit. Now right click on the Unit folder and select Z.Application > Add Unit. Enter the name Quickstart. We also want to directly add an instance of this unit to the program. Note that this feature allows to have more than one instance of this unit.

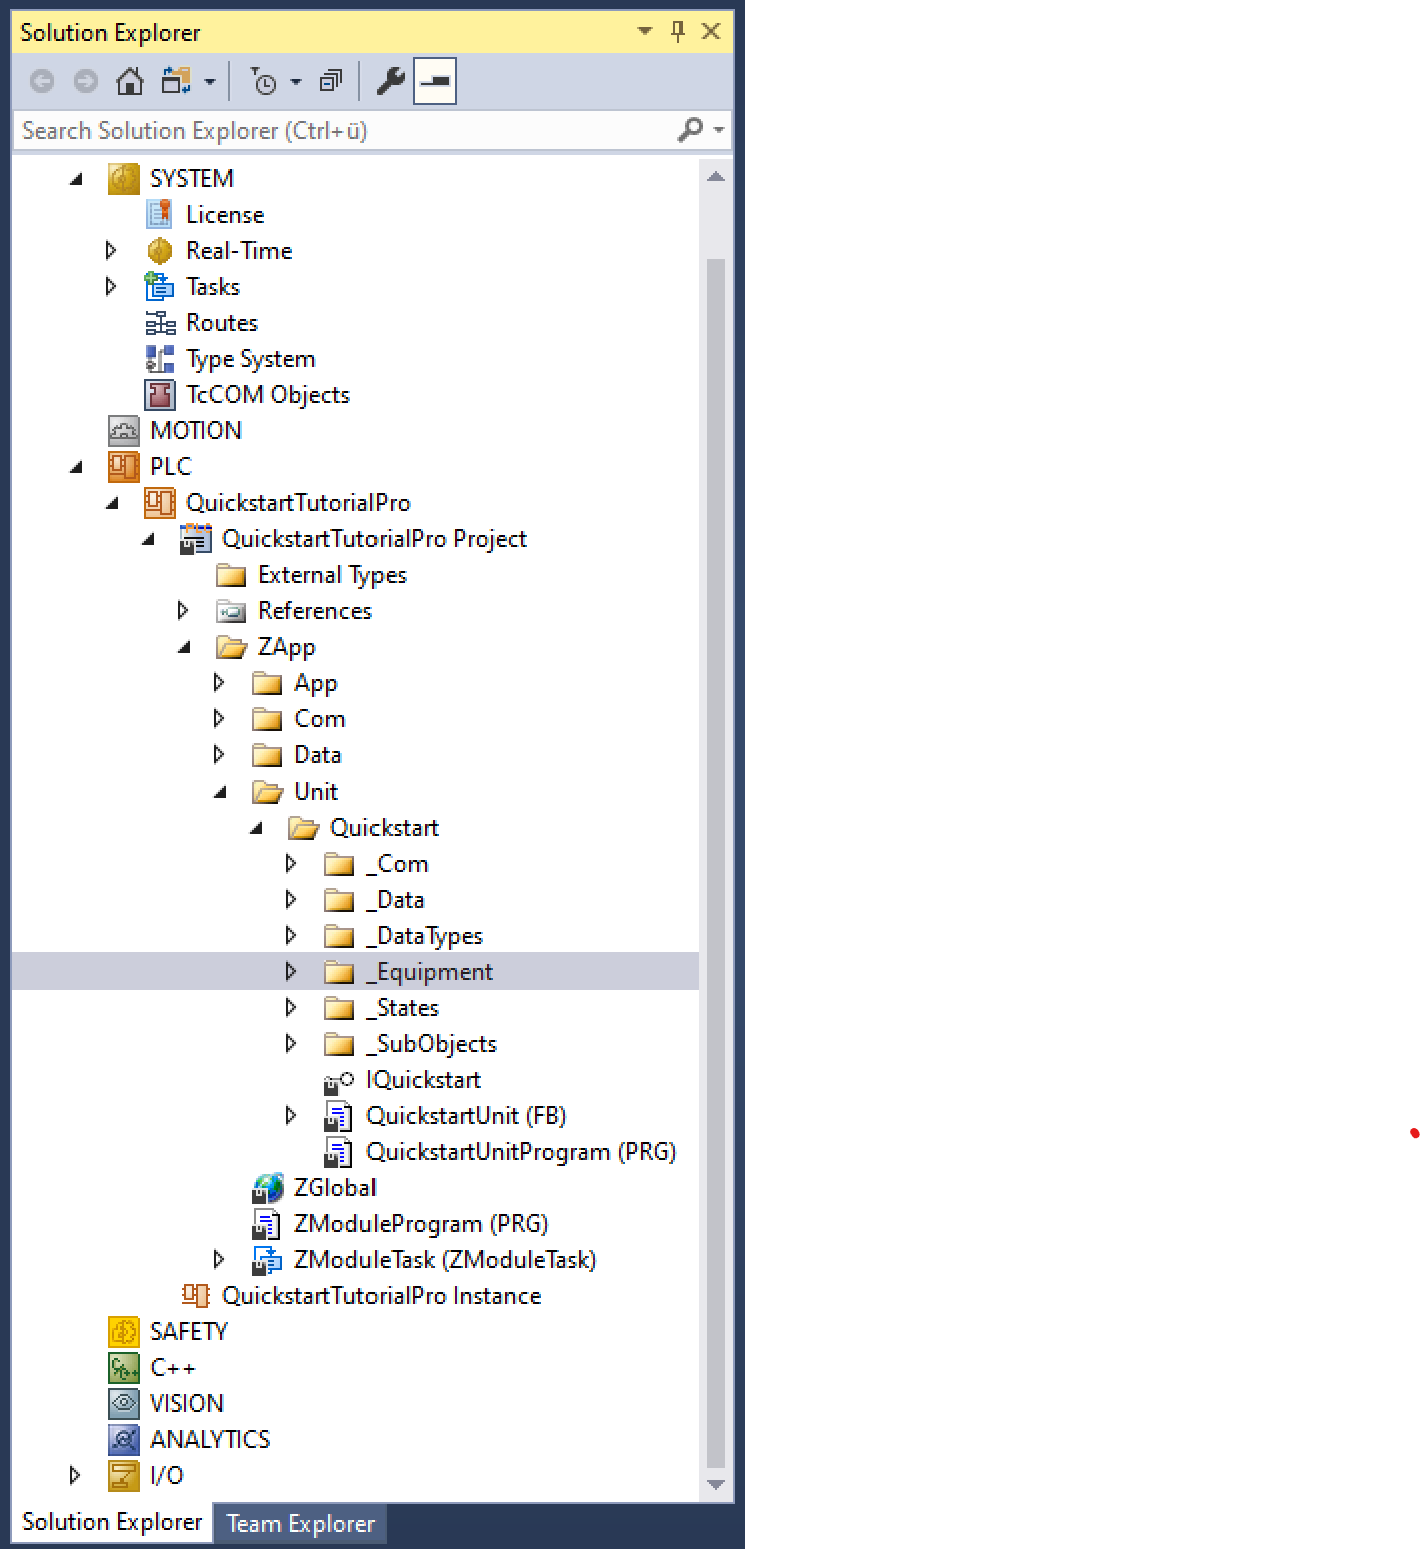
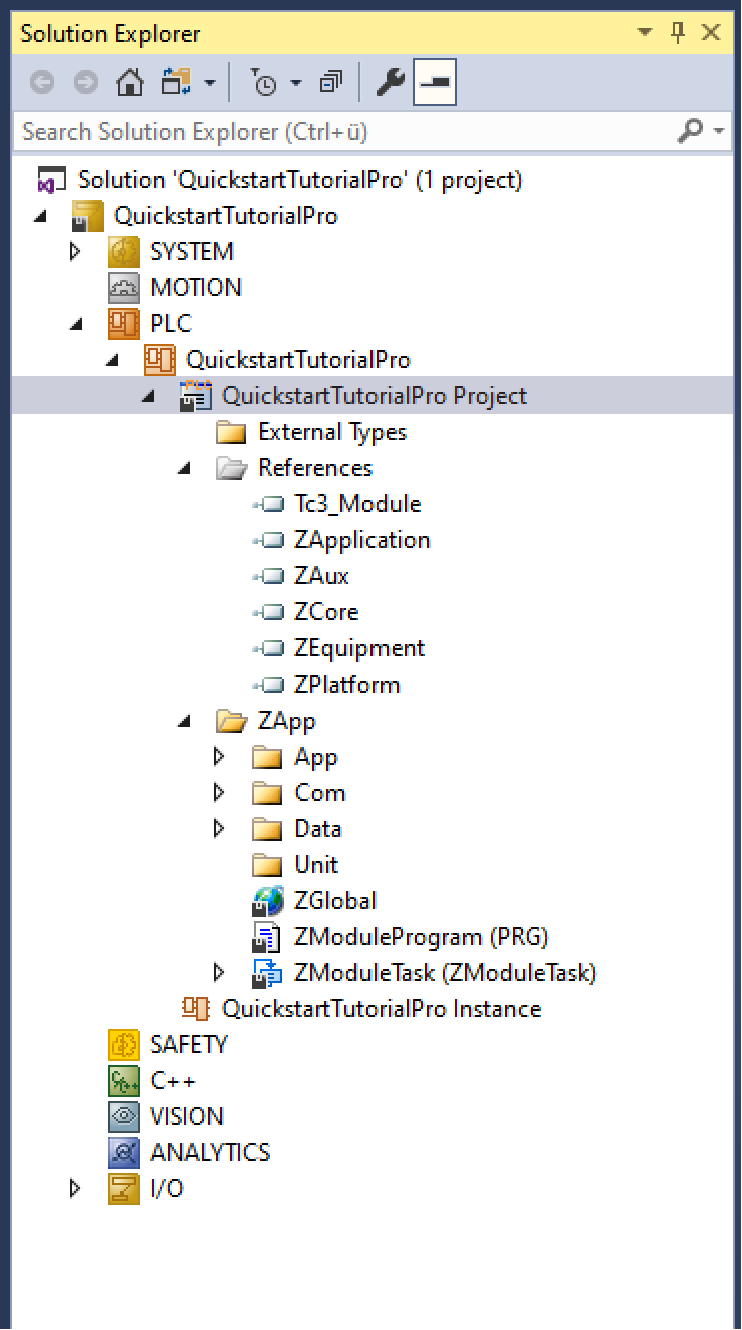
Zeugwerk Creator adds a predefined structure for every created unit to the PLC project.
_Comcommunication structures for external application (i.e. HMI)_Datacontains a predefined data structure for persistent data._DataTypesimplements enumerations and structure that are shared between datatypes utilized by the unit._Equipmentis comprised of function blocks that represent hardware objects (= equipment), like digital inputs, digital outputs, actuators and axes._Statescontains sequences for each state of the standard Zeugwerk Template statemachine (e.g. GoHome, Automatic, FaultReaction, Stop) (see)._SubObjectscontains boiler plate code that makes equipment and sequences easier to initialize.- And of course the function block for the Unit itself and an interface to interact with the unit with a contract.
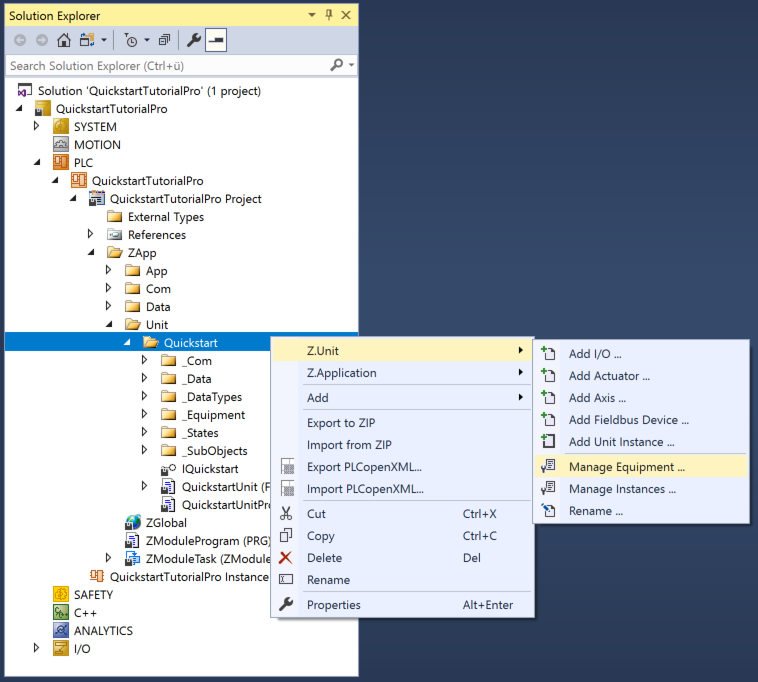
The next step is to integrate equipment that the Unit utilizes to fulfill the Quickstart Tutorial's process. The Creator offers several ways to add the Equipment. Since we want to add all equipment in one go instead of one after another, we use the Manage Equipment dialog. In the solution explorer right click on the Unit name (e.g. Quickstart) and in the menu select Z.Unit > Manage Equipment.
This dialog is empty for now, because the unit doesn't contain any equipment yet.
Let's start with adding an axis instance. Therefore, click on New Axis in the manage Equipment dialog. In the following window we have to select a name, the type of the instance, the simulation setting and if we want to be able to command and control this axis by the Axis test.
- Displayname:
TransportX - SPS Instance:
TransportX - Type:
NC Motion - Simulation:
Unit Setting - Axis Test:
Checked
Next, create an actuator instance. Click on New Actuator. An actuator has a bundle of settings which have to be provided. For the detailed description of those settings refer to the docs. For now just enter the settings provided here:
- Displayname:
CylinderY - SPS Instance:
CylinderY - Actuator Type:
Bistable | LsPlusMinus Observed - Simulation:
On (Manual)Manual allows the 3D visualization to toggle the actuator's limit switches according to the position of the piston. More on that in the next section. In automatic simulation mode the PLC would automatically toggle the digitial input after the expected movement duration +/- a simulation uncertainty. - Actuator test:
Checked - I/O test:
Checked - Name for MovePlus method:
Up - Name for Plus Limit switch:
IsUp - Name for MoveMinus method:
Down - Name for Minus Limit switch:
IsDown - Waiting duration for stop:
0 - Simulation uncertainty:
10%
There are also several durations, which have to be set. These include but are not limited timeouts, which raise errors if the actuator does not reach its destination within a given timeframe. Each actuator also comes with durations that are specific to the simulation mode, where actuators are automatically switching internal state variables after a given time to simulate that the piston has reached its destination. All durations are given in seconds. Use the following values for the durations of CylinderY.
| Action | Delay at start (s) | Output switched on duration (s) | timeout for input (s) | moving duration (s) | delay at end (s) |
|---|---|---|---|---|---|
| Move Plus | 0 | 0.2 | 5 | 3 | 0 |
| Move Minus | 0 | 0.2 | 5 | 3 | 0 |


Now lets add some I/Os. Click on New I/O on the bottom left of this dialog. A new dialog opens, which shows settings for a I/O instance. In the quickstart we utilize 4 I/Os, please add them to the unit's equipment accordingly to the following table.
| Name used for logging | Name used in the PLC | Type | Simulation | Add to I/O Test | Add Logger Instance | I/O logic |
|---|---|---|---|---|---|---|
| MagnetOn | MagnetOn | DigitalOutput | Unit Setting | normal | ||
| LimitSwitchLeft | LimitSwitchLeft | DigitalInput | Unit Setting | normal | ||
| LimitSwitchRight | LimitSwitchRight | DigitalInput | Unit Setting | normal | ||
| ConveyorOn | ConveyorOn | DigitalOutput | Unit Setting | normal |
Note that equipment that is already added to a unit can be edited by double clicking on the corresponding item in the Manage Equipment dialog.


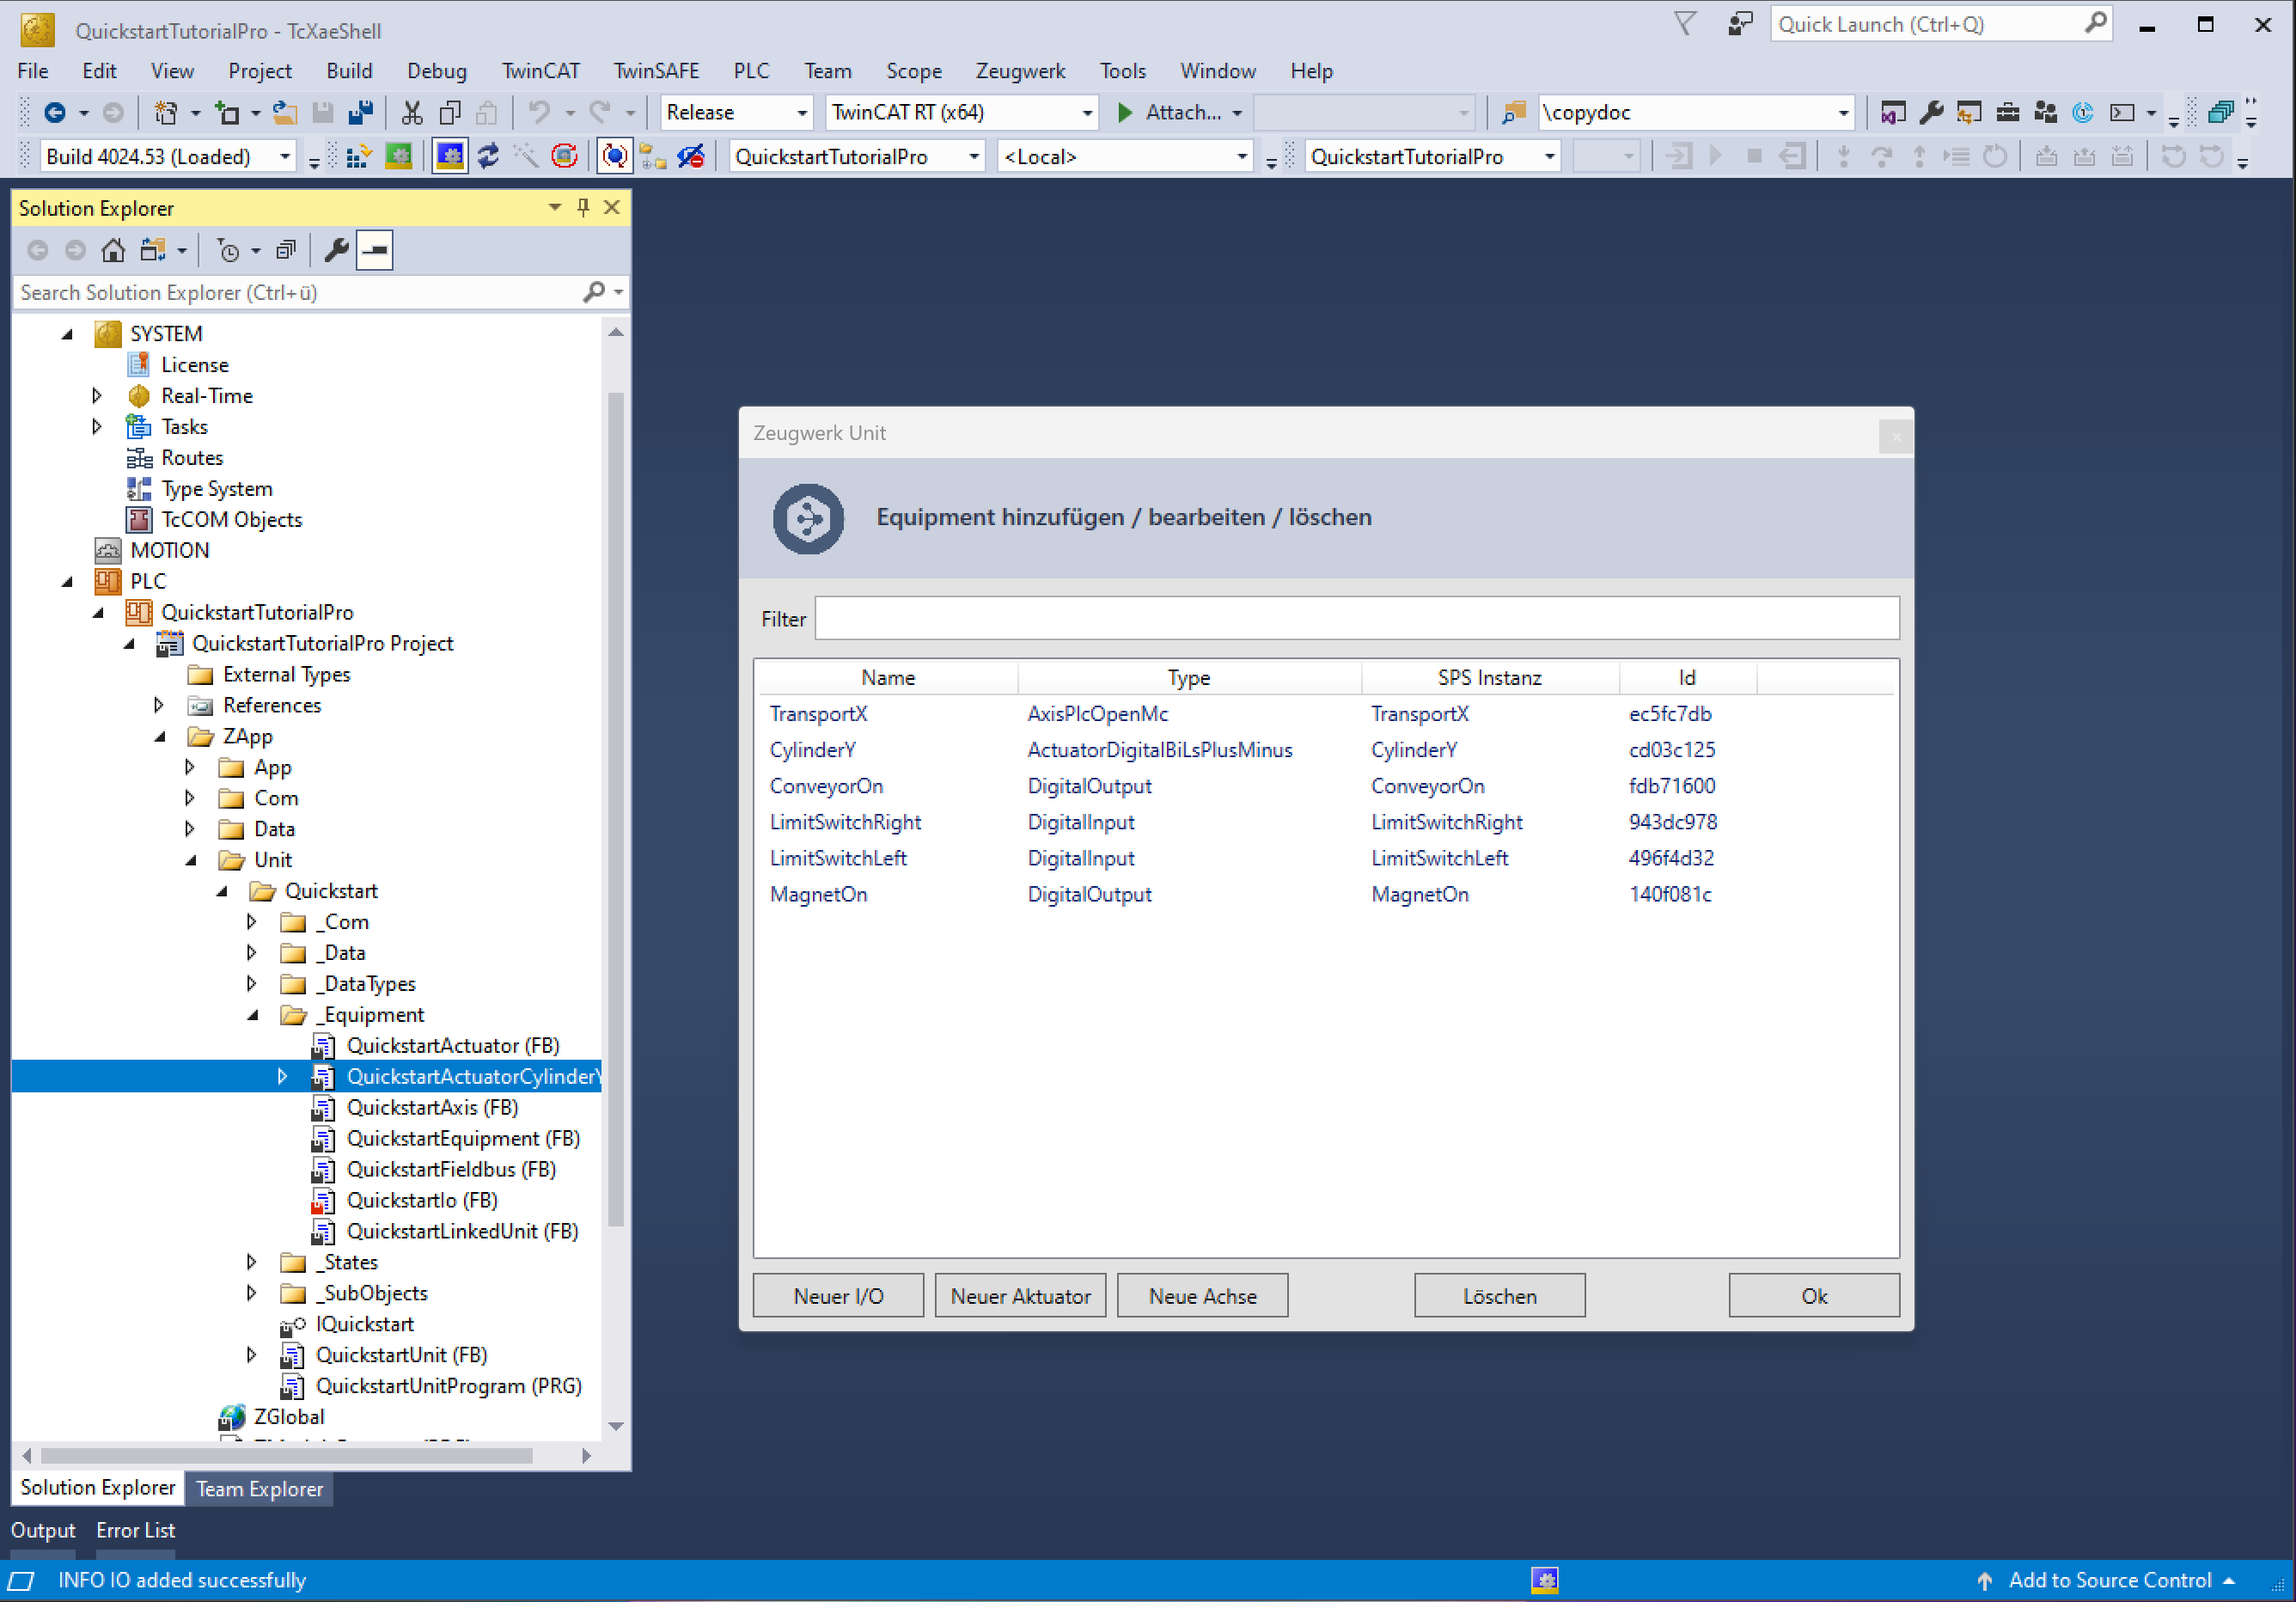
The unit and its equipment is created and after linking the fieldbus to the just created equipment would be ready for commissioning.
Implementing all sequences
Until now we only took care of modeling a unit and its equipment. Now it's time to breathe life into the Quickstart PLC by implementing sequences. In this section we focus on getting the PLC ready to go. The sequences, which every unit should implement are
- Stop stops all axes and actuators in a well-defined, "safe" order
- GoHome brings the machine in a well-defined state regarding its equipment and resets a potential fault
- FaultReaction stops the machine as fast as possible
- Automatic implements the main purpose of the unit
We will go into more details about the sequences in the upcoming sections, for now, to conclude this part of the tutorial copy & paste the source code shown below into the designated files, which reside in the ZApp/Unit/Quickstart folder of the PLC. In total 5 files have to be changed before you can continue to the next section, use the tabs below and change the source code in the PLC accordingly.
- _States/QuickstartSequenceStop
- _States/QuickstartSequenceGoHome
- _States/QuickstartSequenceFaultReaction
- _States/QuickstartSequenceAutomatic
- _DataTypes/QuickstartStep
Declaration
FUNCTION_BLOCK QuickstartSequenceStop EXTENDS QuickstartSequence IMPLEMENTS ZCore.ISequence
VAR
  _step : ZCore.Step(QuickstartStep.StopBegin, QuickstartStep.StopEnd);
END_VAR
Implementation
IF OnStart(_step) THEN
  ; // init custom sequence variables here ...
END_IF

REPEAT
  LogStep();

  CASE _step.Index OF
    (* ------------------------------------------------------------- *)
    QuickstartStep.StopBegin:
    (* ------------------------------------------------------------- *)
      IF _step.OnEntry()
      THEN
        _io.ConveyorOn.Enable(FALSE);
        _axis.TransportX.StopAsync(THIS^);
        _actuator.CylinderY.StopAsync();
      END_IF

      Await2(_actuator.CylinderY, _axis.TransportX, nextStep:=QuickstartStep.StopEnd);

    (* ------------------------------------------------------------- *)
    QuickstartStep.StopEnd:
    (* ------------------------------------------------------------- *)
      SetBusy(FALSE);

  ELSE
    Abort('sequence contains unhandled step');
  END_CASE
UNTIL _step.IsNotRepeatable() OR_ELSE NOT Busy END_REPEAT
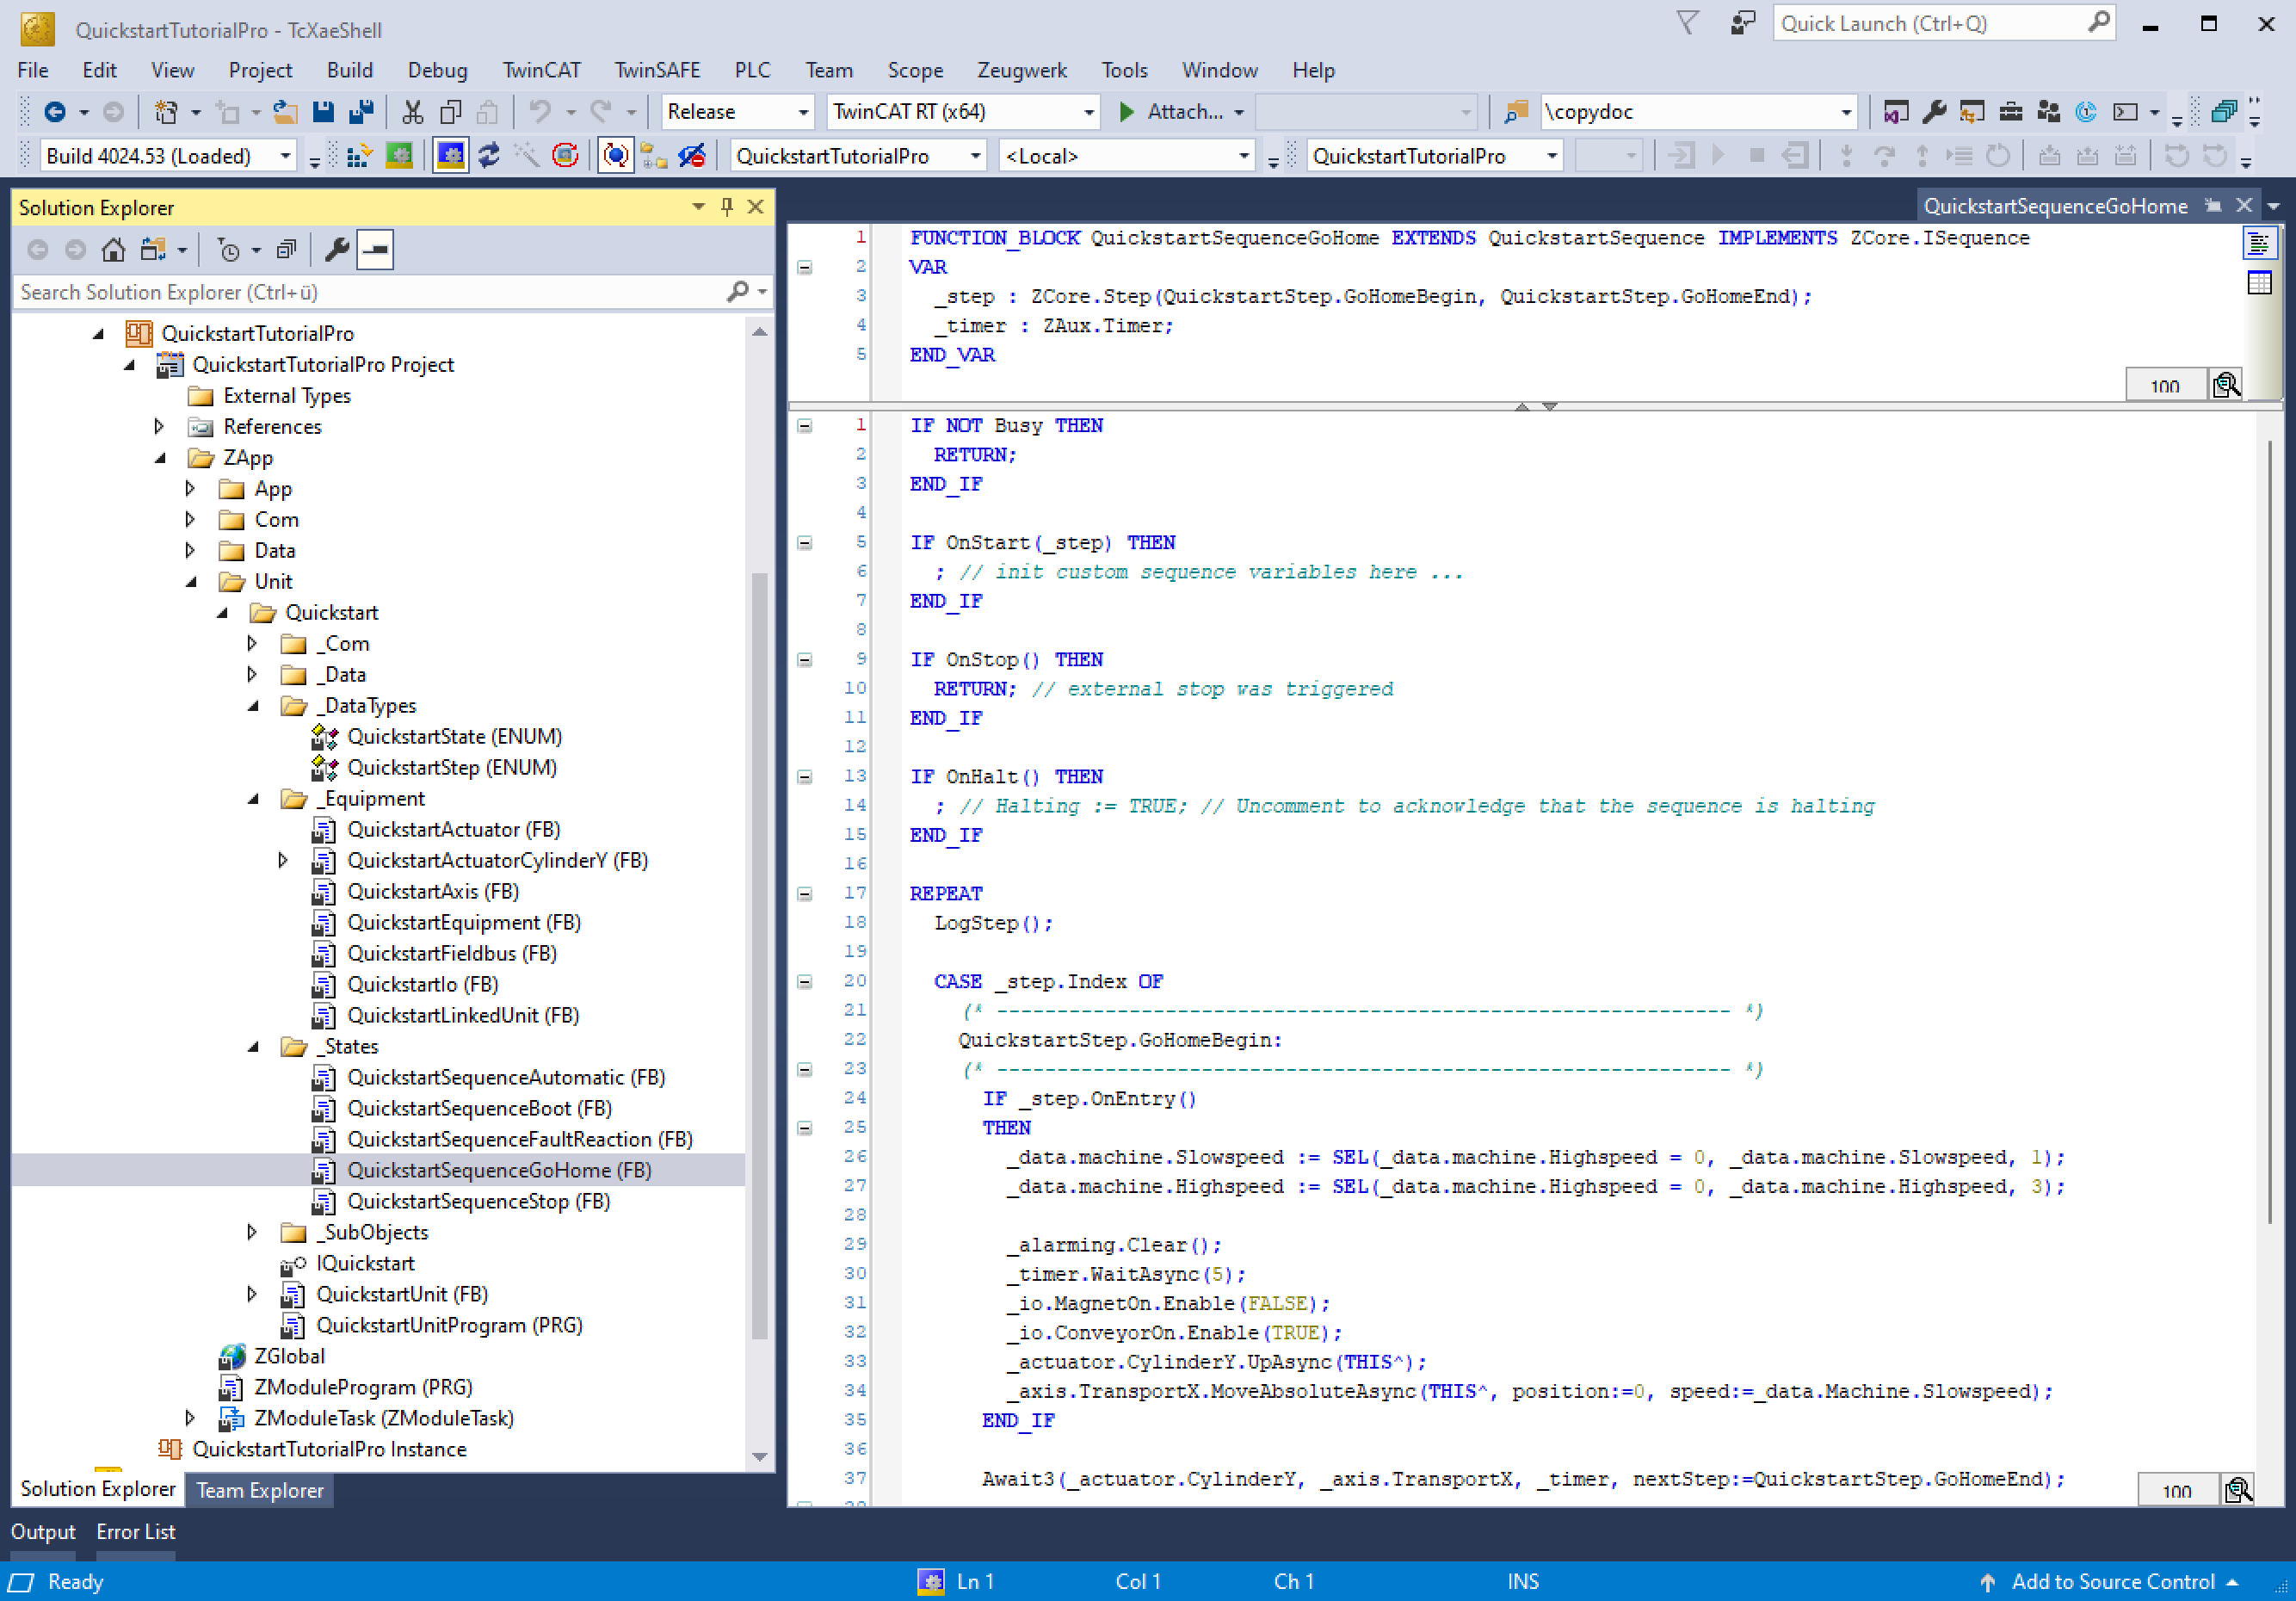
Well done, we now re-created the PLC of the Quickstart Tutorial with the Framework Integration provided by the Zeugwerk Creator.